BBQ-Toro Stainless Steel Rib Rack Holder

I’ve been cooking ribs various times for a few years now and when I need to cook 6 racks, it takes up virtually all the space in my Weber Smokey Mountain 57cm, so no room for any more meats.

I’ve tried a few things over the years to act as a rib rack, a rib roast holder upside down, the IKEA pot lid organiser but they weren’t up to the job.

A quick search on the internet I found the BBQ-Toro Stainless Steel Rib Rack Holder. This looked sturdy and ideal for my needs. Ordered from Amazon (check availability) end of May 2020 it arrived a few days later. Looking at the reviews on Amazon, some people complained that the edges were razor sharp so be careful when using. I must admit some edges were a bit sharp but nothing I really worried about and not as bad as the reviews claimed.

I prepped 6 racks of baby back ribs (sourced from Costco), applied some French’s mustard to them and sprinkled my favourite rub over them. I let them sit for 20 mins whilst the smoker was coming to temperature. Then on goes the rib rack holder followed by all 6 racks. The racks slotted in perfectly with a little overhang at each end. I was worried at first that it maybe too big to close the lid with all 6 racks in, but I didn’t need to, as it closed just fine.

The ribs held perfectly over the duration of the cook and left me with a whole rack on the lower part of the WSM free so I could cook other meats if I needed to.

Overall this rib rack holder is a great solid piece of kit and I will be using it a lot now when cooking baby backs. I haven’t tried with spare ribs, but I’m pretty sure I won’t be able to get 6 racks on the top shelf. I would probably cook on the lower rack shelf and remove the upper, which should do the trick.

Unfortunately at the time of writing this review it seemed to be out of stock on most places online, if you can find it and are looking for a rib rack, I highly recommend this rib rack holder.

BBQ Stu
Twitter  –  @bbqstuuk
Instagram  –  @bbqstuuk

Note: I was not paid to review or gifted this rib rack holder. I purchased it full price from Amazon.

Buttermilk Wings

Buttermilk Wings

  • Prep Time30 min
  • Cook Time40 min
  • Total Time1 hr 10 min
  • Yield2-3 Servings
  • Cuisine
    • American
  • Cooking Method

Ingredients

  • 1kg wings
  • 100 gms of Tropics Foods Texas BBQ chicken fry mix
  • (OR 30g BBQ Rub ,10g baking powder ,10g self raising flour )
  • 1/2 pint buttermilk with a generous shake of hot sauce
  • Favourite BBQ sauce, we used Red Dog Texas Chipolte which has a nice kick.

Method

1

Soak the wings overnight in the buttermilk overnight, if you can’t get buttermilk you can use 250ml milk with 1tsb of lemon juice. (I like to separate the wings at the joint, but you can leave them whole if desired. )

2

After marinating take them out of the milk, drain but don’t pat dry.

3

Toss your wings in the chicken fry mix. Put them on a rack on a plate and leave in the fridge to dry for 30 mins.

4

Set up your bbq for indirect cooking and heat to around 350°F or 180°C.

5

Cook for 40 mins..

6

Check internal temp is 165°F or 74°C

7

Remove from bbq, and toss in a sauce of choice. Serve with blue cheese sauce and celery

Recipe from Chillin N Grillin NI.

Free Recipe Card

Download the free PDF Recipe Card

Gambas Pil Pil

Gambas Pil Pil (Chilli and Garlic Prawns)

If you have ever been to spain you will most likely have seen this on the menu.
Its such an easy dish to recreate and works great on the BBQ.

Gambas Pil Pil

  • Prep Time15 min
  • Cook Time10 min
  • Total Time25 min
  • Yield2 Servings
  • Cuisine
  • Course
    • Appetizer
  • Cooking Method
    • Direct in Pan

Ingredients

  • 60ml of olive oil
  • 1 garlic clove sliced
  • 1/2 tsp of chilli flakes (or more if you like it hotter)
  • 200gms freshwater prawns (you can use tiger prawns but this is traditionally made with smaller juicer prawns)
  • A pinch of parsley (Optional)
  • Toasted sourdough bread to serve

Method

1

Heat the oil in a heat proof dish on the bbq

2

Add the sliced garlic and chilli and cook until sizzling

3

Toast the bread

4

Add the prawns and cook until they start to give out the juice (this is what helps make a delicious dipping sauce for the bread)

5

Sprinkle with parsley and serve along side the bread

Free Recipe Card

Download the free PDF Recipe Card

BBQ Hake with Langoustines

BBQ’d Hake, lightly smoked Kilkeel Langoustines, charred new comber baby potatoes, and grilled asparagus spears, blow torched chorizo & herb butter.

Dean Coppard is a well known chef in Northern Ireland, He is currently head chef at the Sweet Afton Bar and Kitchen. He grew up in Queensland Australia.

As he lived so close to the beach his father went fishing and brought home some amazing fresh fish which they barbecued. He moved to Northern Ireland in 2005 became head chef of the well known Yellow Door and then opened Uluru Bistro, an Australian restaurant in Armagh, it was recognised in the Michelin guide with 2 knife and forks.

He is an avid supporter of local suppliers and believes that Northern Ireland suppliers are going from strength to strength. He still lives in Armagh with his wife and 2 children who love eating out.

Although this recipe is cooked on a Mini Kamado, its easily adapted to other BBQ’s as its just Direct and Indirect grilling.

BBQ Hake with Langoustines

  • Prep Time30 min
  • Cook Time15 min
  • Total Time45 min
  • Yield2 Servings
  • Cuisine
  • Cooking Method
    • Direct / Indirect

Ingredients

  • 2 x 240g of fresh hake, skin on, scaled, pin boned.
  • 6 whole langoustines, split in half length ways.
  • 300g of new baby potatoes.
  • 6 tips of asparagus
  • 200g of butter
  • 100g of chorizo
  • 4 sprigs of fresh coriander
  • 50ml of Broighter Gold Hickory Rapeseed Oil

Method

1

Using a direct and indirect set up, light the bbq

2

Once the temperature is sitting between 180-200°C oil the grill barred grill rack and place the hake fillets skin side up over the direct heat area

3

Close the lid with the vent set to fully open and bake for 6 mins.

4

Open the lid and using a pallet knife or fish slice gently loosen the fish off the grill rack and set over the in-direct heat area.

5

Preboil the new potatoes until just cooked or still firm, remove from pan and slice into 1-2cm thick discs, coat these and the asparagus spears in a good quality rapeseed oil, I used the Broighter Gold Hickory Smoked infused oil giving the veg a rich flavor that gives depth once heated.

6

Add to the grill and place the halved langoustine on top. Cook for a further 4mins.

For The Butter

7

Soften the butter and add to a food processor blitz with the chopped chorizo and fresh coriander, roll in grease proof paper to form into a log shape and rest in the fridge

To Plate

8

Place the cooked potatoes on the plate first, rest the hake on top add the asparagus then finish with the grilled langoustine and slice the butter on the langoustines and blow torch the butter until it melts covering the langoustine and the hake.

Free Recipe Card

Download the free PDF Recipe Card

Make Your Own Bacon

If you haven’t tried curing your own bacon, a kit is a good place to start. We got this one from The Smokey Carter who kindly shared their instructions with us. There are a number of other companies who make bacon kits in a variety of flavours

I normally cold smoke my bacon in the winter but as it is too warm due to the summer months I thought I would start with the smokey hickory bacon cure.

The Smokey Carter Bacon Cure kits are available from here

Make Your Own Bacon

    Ingredients

    • The bacon curing kit contains enough cure to make 4kg of bacon and has two different flavours.
    • The following recipe is based on making 1kg of bacon at a time, so you will only require half a pot of cure (40g) per 1kg of pork.

    Curing Kit Contents

    • Curing Time: 7 Days
    • Make Your Own Bacon with bacon Hone Curing Kit
    • Curing Kit Contents
    • 1 x 80g Fennel & Lemon Pepper Bacon Cure
    • 1 x 80g Smokey Hickory Bacon Cure
    • 2 x 60cm of muslin mutton cloth
    • 2 x curing bags
    • 4 x plastic gloves

    What you will need in addition to the kit (not included)

    • 4 x 1kg of pork. Only 1kg of pork is required per batch. Use belly pork for streaky or pork loin for back bacon.
    • Sharp knife
    • Kitchen roll
    • Wire rack

    Method

    Home Curing Instructions

    1

    You can visit your local butcher for your pork, although even supermarket pork makes great bacon.

    2

    You need 1kg of either belly pork or pork loin, depending on the type of bacon you want to make. Belly makes streaky and loin makes back bacon.

    3

    Wash your hands thoroughly, put on a glove and place the pork into a plastic curing bag.

    4

    Pour in 40g (half a pot) of your chosen cure and massage into the meat to ensure the cure has covered the whole piece of meat. Seal the bag ensuring that there is no air left in the bag.

    5

    Place the bag in the fridge and leave undisturbed for two days.

    6

    Turn the bag over and leave for a further two days in the fridge.

    7

    After four days in the cure you will notice the meat will have slightly firmed up. Put on a glove, remove from the bag and rinse the pork under a cold running tap. Discard the plastic bag.

    8

    Dry the meat with a few pieces of kitchen towel, ensuring most of the moisture is soaked up.

    9

    Take a piece of the mutton cloth and place the meat inside, folding the edges underneath.

    10

    Place a wire wrack on a shelf in the fridge and place the wrapped pork on the rack. Leave undisturbed in the fridge for three days.

    11

    Unwrap the mutton cloth and slice off the required amount of bacon with a sharp knife. Cook and enjoy. Congratulations, you’ve made bacon!

    12

    Re-wrap the remaining bacon in the muslin and keep in the fridge for 4-6 days. Slice as you go.

    13

    You can also slice the bacon and freeze to use at your convenience.

    Tips
    If you like your bacon more salty you can leave it in the cure for an extra day.
    The mutton cloth can be cleaned in the washing machine and re-used to make another batch with the remaining cure.

    ProQ Excel – Smoker

    Some brands of BBQ manufacturers produce a product and then stick to the ‘If it aint broke, don’t try to fix it’ school of thought. Well that’s all well and good but more recent times in the BBQ world have meant that some of these long standing and well-established manufacturers are being left behind. The market for outdoor cooking is ever growing, and more and more people are looking to get involved, and are now armed with more knowledge than ever of cooking styles and types of BBQ and grilling, thanks to social media, BBQ blogs and YouTube videos. As that’s where more forward-thinking brands like ProQ have stepped up to the challenge.

    Way back to their original models of the classic ‘bullet shaped’ smoker (so named because of the shape), it was clear that ProQ wanted to offer their customers more. More flexibility, more options, more cooking styles and more enjoyment out of their products. But in the last few years, the guys behind the ProQ brand, looked over their models from top to bottom to see what could be changed to make their smokers even better; the result is a stronger than ever product offering with a host of new features. So, let’s have a look.

    The smallest of the ProQ line up is called the Ranger with a 37cm wide circular cooking grate; next up is the Frontier with a 43cm circular cooking grate; and finally, the largest in this range, the Excel, with a 50cm circular cooking grate. The Excel is the model we will focus on but most of the features discussed span the whole range, but please check the ProQ website for full information www.proqsmokers.co.uk
    I’ve been cooking on a ProQ Excel for around 8 years now but the guys at ProQ kindly offered me an upgrade to the latest version for review. That said, I am still free to give my own and honest opinion on the products in the article.

    One of the biggest changes is to the main construction of the unit and the high-grade porcelain coated steel that is used. Heat retention in these units is key and whilst some manufacturers are saving money thinning the metal and coatings they use down, ProQ have gone the other way, meaning the units are more efficient and less fuel is used for each cook. Who doesn’t like saving money?

    These range of smokers all break down into 4 sections giving several different set up styles, depending on the type of cook you are looking to do. This is one of the major advantages of the ProQ models over similar bullet style smokers, who only usually have one way they can be set up. The 4 sections on the ProQ working from the bottom up, are the base with the legs and 3 air vents, this is the part that holds the fire basket; then stacker 1, which would usually hold the water pan and have your first cooking grate and side handles for moving around; then stacker 2, which holds your second cooking grate and also has side handles; and then finally the lid with the hanging bar inside, the top vent and handle on the outside. Each of these stackers comes with the new and improved spring-loaded clips for a tighter seal.

    So, as I mentioned above, these smokers come with a water pan; if you are not familiar with these, the idea is that for long cooks you fill the pan with water and it creates a nice moist environment inside, to help the meat during the cook, but to also help the smoke get onto the meat too. It also helps to keep a more even temperature as energy is used to heat the water, so less swings up or down in temp.  Just make sure the water pan doesn’t boil dry else you may see that temp change pretty quickly. A mistake we’ve all made.

    Hanging meat in a smoker has become way more popular in recent years, and whilst the ProQ models (Ranger excluded) have always had a hanging bar tucked away in the lid it has mainly been used for cold smoking. But now more and more people are hanging racks of ribs and legs of lamb, as well as many other cuts in their smokers. And with the water pan removed, any fat drips go straight down onto the coals, creating an unmistakable smell and flavour that is one you just have to try. And once you do you’ll literally be…. hooked.

    Vents! How many times have you burnt a finger adjusting a vent during a cook, well it’s no longer a problem with the cool touch tabs on all of the vents and handles. This covers the 3 daisy vents at the bottom, the exhaust vent at the top and also the chamber door and lifting handles on each of the stackers. No more burnt fingers for any changes needed during a cook.

    The fire basket has now been improved to incorporate grooves, so one of the grills will fit securely in place if you are using it for high heat direct grilling, and there is also now a stand holder so you can attach one of ProQ’s other accessories, their Flip N Grate. Also handy and giving you huge versatility on the way you can cook from one single BBQ.

    Each stacking level has a single silicone probe eyelet so you can easily feed through 2 wires for meat probes or grill temperature probes. These come in handy when you are cooking multiple meats on different levels in the BBQ. As they are silicone it means they won’t damage your cables and you don’t have to worry about feeding cables in through a vent or trapping them between the lid and potentially breaking a cable. A simple thing but really does help.

    Whilst most of these ideas have focussed on the ProQ being a smoker one of the best tricks it has up its sleeve is by removing the middle stackers and leaving but the base and the lid. Now you have a super portable grill you can take anywhere with you for a picnic, to the beach camping or wherever you need to. How many other BBQ’s have that as an option?

    All of these features and ways of cooking really give you a sense of why the ProQ offers such excellent value for money. All of this is backed up by a level of customer service that is second to none. Should you ever need to, the team will be happy to help via email or over the phone which can be a rare thing these days.

    So I’ve owned a ProQ smoker in some form for around 8 years now and there is a good reason for that, they just work and they give you so many cooking options at a very reasonable price. And that price does not mean a compromise on quality. It has taken me from an absolute beginner cooking my first ever pork shoulder smoker overnight, through to the variety of cooks we now enjoy and with a lot more confidence in using the smoker. You can see from some of the pictures here and on many more of my social media feeds how much I enjoy cooking on my Excel in various different set-ups. And there are now more options too with the new plancha, rotisserie and Smartfire attachments, some of which we will discuss in later reviews so please keep checking back.

    Please check out the ProQ website to see their full range of products including accessories, large commercial style smokers, cold smokers, BBQ controllers, charcoal, smoking wood, as well as recipes and tips.

    Follow ProQ

    Twitter : @ProQSmokers

    Instagram: @proqsmokers

    Website: www.proqsmokers.co.uk

    Artust

    Twitter : @ArtustBBQ

    Instagram: @artustbbq

    Outback Jupiter 4 burner Hybrid BBQ Review by ArtustBBQ

    Around this time of year, I get asked the question a lot about what grill should someone buy. It’s such a massive question as what’s right for one isn’t right for another, then there is space, budget, family size and so many other factors to be considered. But the first starting point for most seems to be gas or charcoal.
    Now as a big BBQ fan, my heart always leads with charcoal, but you forget that for the majority of folks out there the convenience of a gas grill is right for them and their situation, hence why they always were, and still are, so popular with many backyard grillers.

      But what if there was the option to have a grill that could do both? The convenience of a quality gas grill, but also the opportunity to really drive some charcoal flavour into the food you cook too? Well that option now exists through the Outback BBQ’s range of Hybrid grills. New for 2020 is the Jupiter 4 grill from Outback and that’s the one we will focus on for this review, however you can see the full range on their website, and you’ll find the link at the bottom of this article.
      For total clarity, I was sent the grill to review and I have also worked with Outback for content creation for social media. This does not mean, however, that I must give this grill a good review, my account and uses below will be honest and detailed. The grill was delivered to me disassembled as it would be delivered to a customer, this gave me the opportunity to get hands on with the nuts and bolts of the grill and understand the build quality. In a real world situation it took 2 of us around 1 hour and 20 minutes to build the Jupiter 4. This was with a few refreshment stops along the way.

      Thankfully for me and anyone buying this grill, large sections are assembled in the box ready for you to just build the main base stand and then bolt together. The instructions are pretty clear and easy to follow and we had no missing parts. There may be some re-sellers of the Outback range who will assemble them for you for a small additional fee.

      Let’s start by discussing the basics of what a hybrid grill is. The name Jupiter 4 is linked to the fact this is a 4-burner gas grill, meaning essentially, they are 4 stainless steel tubes underneath the grates creating heat from gas. They get super-hot very quickly which is why people love the convenience of this type of grill. Switch the burners on, shut the lid and within a few minutes the grill is up to temperature and you are ready to grill. Wait a few minutes more and you’ll be up to super-hot temps ready for searing steaks etc. Remember the bars of the grill always take a touch longer to catch up heat wise and really absorb all the heat for searing etc.

      Each of the dials on the front of the grill is linked to a burner and as the dial is turned, you’ll hear an ignition click and the burner will be alight, it’s then fully adjustable through the heat range from low, medium then to high. So, if you were only cooking something small and quick, then you may only need to light one burner and so you use less gas and keeping the lid down through any cook makes the grill even more efficient and helps to stop flare ups too. Above the main grill there is also a removable warming rack which is there to help you find a cooler area for food that is cooked whilst you wait for others to finish. In addition to the four main burners this grill also includes a side burner gas ring that you can use independently of the grill itself. This is perfect for warming sauces, melting a garlic butter for basting or boiling some new potatoes, or anything else you need.

      So, we’ve covered the gas side of the Outback grill, here is the hybrid part. You can lift out the grills and then take off the v shape covers that sit over the gas burner bars and insert what Outback call their ‘Charcoal basket’. This can then be loaded with specially produced Outback briquettes laid out in a grid pattern (shown in the pictures of the review). You simply then light the burners underneath the charcoal basket, set to full and shut the lid. When you return 15 minutes later the briquettes should be alight, ashed over and ready to cook on. So simply turn off the gas burners and then all your heat comes from the coals. Now you are ready to get that lovely charcoal flavour onto your chosen food and it’s great for things like steak and chicken. I used the charcoal basket for my rib cook in the pictures using the indirect method.
      So, I had the charcoal basket off to one side and the ribs away from the heat over an unlit burner, I then placed some small wood chips on the bars above the coals and shut the lid to let the ribs smoke away. I added more wood chips every 15 mins or so, and after 45 minutes turned the ribs 180 degrees so the other side of the rack was now facing the heat. After 90 minutes I wrapped the ribs in some foil with a dash of BBQ sauce and some apple juice and let them run. The briquettes stayed producing the heat needed for about 2hr30 minutes and then I just kicked the gas back on at the end to maintain heat. Once foiled, the ribs weren’t going to take on anymore charcoal flavour so using the gas again was fine.
      Once the ribs were tender, I then unwrapped them, brushed on both sides with a little more sauce and left them unwrapped for the sauce to set for another 10 minutes. The pictures speak for themselves and I was left with a nice lightly smoked rack of tender ribs in just a few hours. Clean up is then made easy by sweeping the briquettes down between the bars into the pull-out drip tray accessed from the back of the grill. There is a handle on the tray, and I have lined mine with foil for easy clean up.

      Having the 4 burners and bigger grill space gives you more options around your chosen cooking methods and range of temperatures too. As mentioned above you can set up zones in your grill for either direct cooking where the food is directly above the heat, or indirect where you set the food off to one side away from the heat for slower cooks making more of an oven effect with heat convection. All of this is a good thing.

      So, what are the interchangeable multi cook grills inserts? Obviously, the grill style centrepiece comes included in the grill, but for a small additional cost you can buy additional inserts for the centrepiece to help you cook in different styles. Outback kindly sent with my kit the pizza stone and the double-sided porcelain griddle featuring a flat top surface perfect for fried eggs or pancakes, and grilled side with ridges for those perfect grill marks, and there is even a wok too. I used the pizza stone for well… Pizzas and I have to say as an owner of a pizza oven I was genuinely surprised by the results, just some super high heat from all four burners and within 5 minutes I had perfectly cooked home pizza. I did use some homemade dough to really make sure you got the best crust possible, but I would definitely get this insert and have a go. I also used the flattop as part of a full English breakfast cook up I did and It couldn’t have gone better. Perfectly cooked eggs with runny yolks and the whites just crisped at the edges, sausages, bacon, beans, mushrooms and some hash browns for good measure.

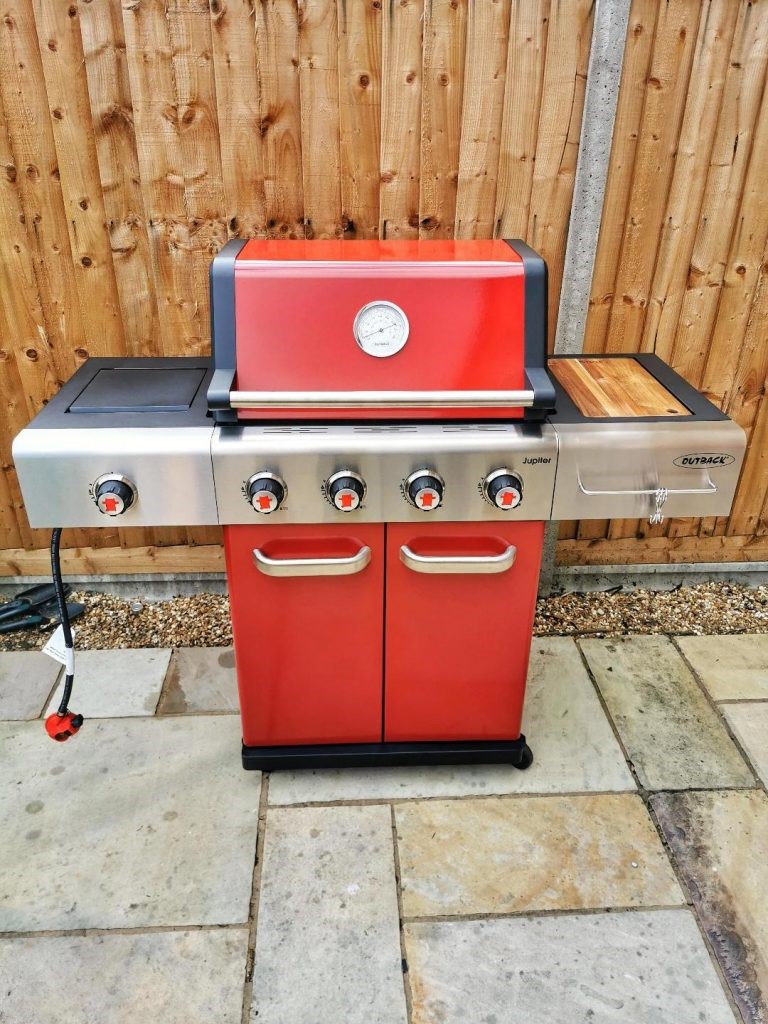
      Let’s talk about the cool bits this grill has built in that Outback feel make life at the grill a little easier. The built-in bottle opener kicks things off, neatly built into the side of the grill it’s tucked away but there when you need it. The opener also has a magnetic base meaning no more bottle caps on the floor hiding in the grass ready to pounce when the flip flops are off. My favourite of all the features has to be the built-in chopping board on the shelf on the right side of the grill. I love this little touch. So handy as it pops out of its location easily with a finger hole for grip, meaning it’s also easy to remove for cleaning after you have been chopping or even better to serve your finished dishes on. Open the doors to the storage area underneath the grill you’ll see a very handy stacking rack for all the inserts for the interchangeable multi cook grill.  Perfect for keeping them all in one place by the grill and out of sight too. The amount of times I have searched around looking for grill bits before in the shed or garage, this just seems so obvious and it’s so useful.

      Along the front of the right hand shelf there is also a hanging bar for you to keep your BBQ tools, hot gloves and even a tea towel on etc. They have provided 3 movable hanging hooks for you to hang any items from too, again just a neat and handy feature. The grill sits on casters so you can it can easily be moved around the garden or out door cooking area. And when you want it to stay in place, 2 of the casters lock to ensure the grill doesn’t move around. As with most grill now, on the lid of the Outback there is a temperature dial to really help you dial in the perfect temperature for your cooks. The dial on the grill feels premium over some and I would describe it as oversized (in a good way) to make it easy to read with a quick glance. Another additional item that Outback sent with the grill was the premium outdoor cover.

      We’ve had all the weather in the last few weeks and the grill has been kept safe and dry from the rain and the cover has stayed in place thanks to the Velcro straps at either end. A must have item for anyone leaving a grill outside and uncovered. The grill also comes with a pre-installed regulator to fit your gas canister.

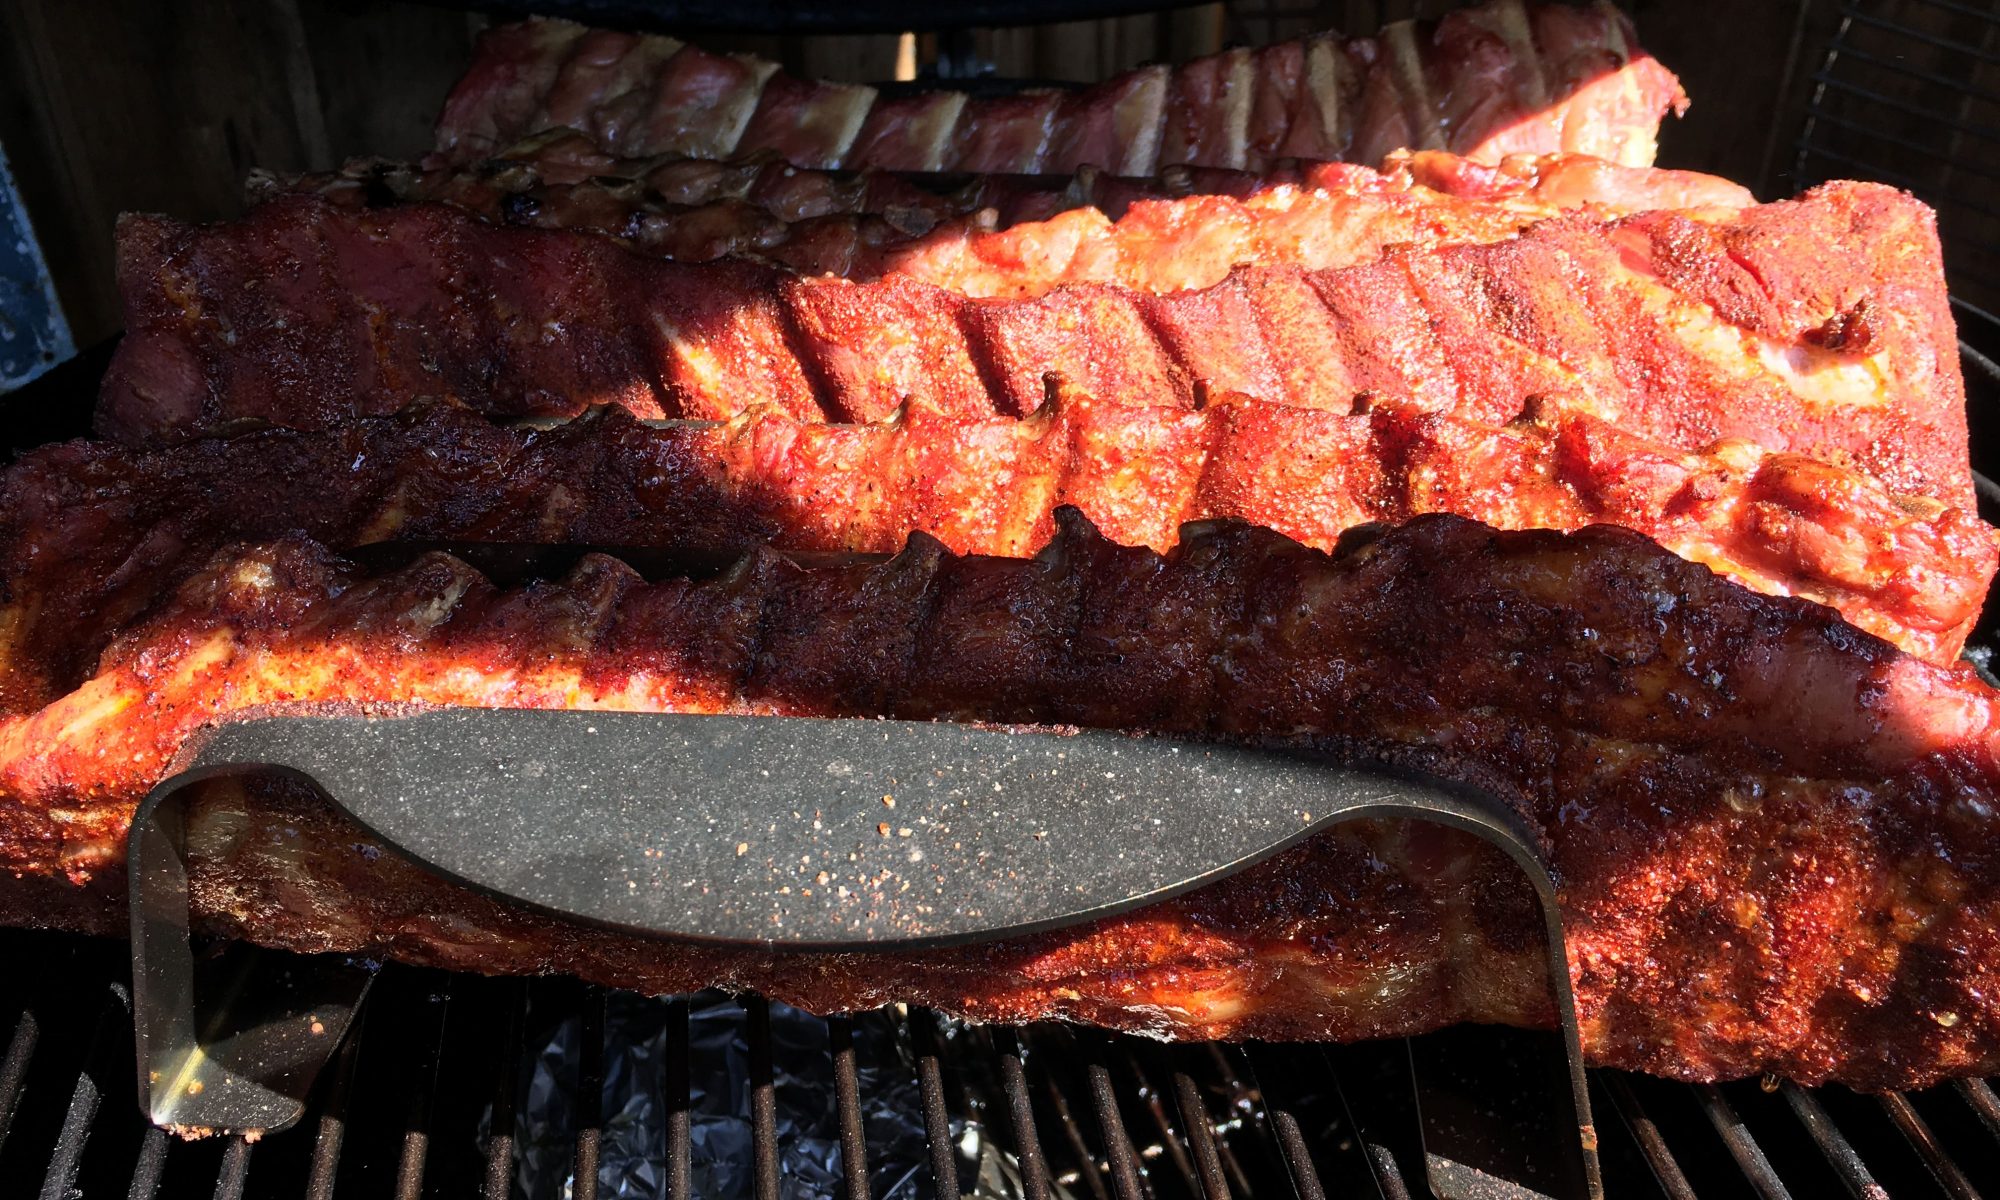
      Wrap up. So far, I have cooked on this grill over 12 times and have been happy with each and every cook. It’s easy enough to build with 2 people, looks great when you have it built too (this model comes in a few different colours so as well as the red I have you can also get blue, green and then stainless steel), it has a lot of well thought out extras that other manufacturers in this price bracket do not include, and most importantly it’s able to cook a whole range of different food using both gas and charcoal and most importantly of all it does it well. To make sure I was giving the grill a fair review I have tried cooks of all different types using both gas and charcoal and I did not encounter any issues. I obviously cannot vouch for the longevity of the grill, but a good cleaning routine and the outdoor cover will help massively. In this hybrid range there is also a smaller 3 burner and a larger 6 burner model should you require more or less space.

      The retail price of this Outback Jupiter 4 grill is £599 and comes with a warranty of 2 years for the hood and body, and 12 months for all other parts.

      About Outback taken from their website. “Since its formation as a family business in 1979, the Outback brand has stood for quality, innovation and total customer commitment, providing a comprehensive range of cutting edge British-designed barbecues, spare parts and accessories that leads the way in quality and value.

      Linked with the world class Chinese manufacturer TPA for the past 35 years, Outback is able to respond to the latest market trends and developments quickly and efficiently – simply click on to any of our comprehensive range of charcoal and gas barbecues to see how we stand out from the competition.

      The Outback factory has been ISO9001 approved since 1995 and has been awarded safety certificates from testing authorities worldwide. We have built our reputation on taking your alfresco dining experience very seriously. From the initial concept and design stages, to choosing the most up-to-date and sustainable materials, right through to our shipping and handling systems, we pay particular attention to every last detail to make sure the product delivers you 100% satisfaction each and every time.”

      Outback and all their range of BBQ’s covers and accessories can be found on their website https://www.outbackbarbecues.com/

      Instagram: @outbackbbqs

      Artust
      Twitter :@ArtustBBQ
      Instagram: @ArtustBBQ

      Marmalade Bread and Butter Pudding

      Leftover bread… Over-catered for your BBQ party and got loads of brioche buns or finger rolls left over?  In fact this pudding can be made with any type of bread, seeded loaf, croissant, pain au chocolat or hot cross bun. Or if you’ve an end bit of a loaf that’s been sitting in your bread bin for a few days, and you’re firing up your BBQ, the pudding can be made well in advance and left in the fridge prior to cooking as the egg custard will soak into the bread.

      Marmalade Bread and Butter Pudding

      • Prep Time20 min
      • Cook Time50 min
      • Total Time1 hr 10 min
      • Yield4 Servings

      Ingredients

      • 6 slices of bread, or a mixture of rolls and buns.
      • Enough soft butter for spreading on the bread
      • Orange Marmalade (about four tablespoons)
      • 200ml milk
      • 60ml double cream
      • 3 large eggs
      • 75g sugar
      • Few drops of vanilla extract or paste
      • Grated zest of 1 orange
      • 1 tablespoon demerara sugar
      • 25g candied peel

      Method

      1

      First generously butter the bread and make up marmalade sandwiches or rolls and cut into quarters to make little triangles or squares.

      2

      In a buttered heatproof dish (I used a terracotta dish 20cm diameter and 5cm deep) arrange the sandwiches standing upright and overlapping each other.

      3

      Whisk up the milk, cream, eggs and sugar together (a hand whisk is fine) and pour this all over the bread.

      4

      Scatter the tops with grated orange zest, demerara sugar and candied peel and leave to soak in for about 20 minutes (or longer) before putting in your BBQ.

      5

      I cooked it in the Kamado Joe Junior, using the deflector plate (indirect on a kettle) and put the dish on the top grill for 50 minutes at a temperature of 150C until the custard is cooked and it is all puffy and golden and the top crust is crunchy.

      6

      Serve while still warm with crème fraiche, cream, custard or ice cream.

      If you have some orange liqueur in your cupboard, zing up the custard with a few drops of that before pouring over the bread!   Also great with dark chocolate pieces added into the pudding!

      Free Recipe Card

      Marmalade Bread & Butter Pudding

      Download the free PDF Recipe Card

      Cabrito al Disco

      Cabrito al Disco

      • Prep Time30 min
      • Cook Time1 hr 30 min
      • Total Time2 hr
      • Yield4 Servings

      Ingredients

      • 750gms Kid Goat Meat
      • 30ml extra virgin olive oil
      • 1/2 onion
      • 1/2 red pepper
      • 1 garlic clove
      • 2 tomatoes quartered
      • 1 tsp smoked paprika
      • 1 tsp black pepper
      • 2 tsp salt
      • 1 tsp dried oregano
      • 1/2 tsp chilli flakes (or to taste)
      • 1 glass white wine
      • 1 can chopped tomatoes
      • 2 spring onions
      • (we also added some bite sized chunks of peeled new potatoes in after adding the tomatoes)

      Method

      Preparing the BBQ Jerk Chicken

      1

      Heat the bbq, with no deflector plates in (if using a ceramic) or set up for indirect on a regular bbq.

      2

      In a lidded pot, brown the cubed meat in the olive oil, then add the onion, bell pepper, garlic and fresh tomatoes

      3

      Cook until the onions are translucent, about 10 mins

      4

      Add the spices, salt oregano, chilli and wine and cook until the alchohol has evaporated a bit.

      5

      Put the deflector plates in if using a ceramic or just move pot to indirect heat on a BBQ and add the canned tomatoes and the potatoes to the pot

      6

      Cover and cook on the bbq for about an hour, until the meat is tender. Add more water if it starts to dry out

      7

      Serve in a bowl with the spring onions sprinkled over and some nice crusty bread

      This is another recipe from our friend James Whetlor's book Goat. It is by Martin Anderson formerly of Mosimanns & Temper Soho.

      James worked as a chef in London for 12 years before returning to his home county of Devon and working at River Cottage
      After buying and keeping goats to clear an area of scrubland, he became interested in the plight of the British Billy Goat

      Free Recipe Card

      Cabrito al Disco

      Download the free PDF Recipe Card

      James Whetlor’s book ‘Goat is available from all good book shops.
      Winner of the James Beard Foundation Cookbook Award for the single subject book 2019.
      Winner of The Guild of Food Writers Best Specialist/Single Subject Book Award 2019

      Publisher: Quadrille Publishing Ltd (5 April 2018)

      ISBN-10: 1787131181
      ISBN-13: 978-1787131187

      Rhubarb Skillet Pan Cake

      Most of you know Sue Stoneman for making bread and cakes on her BBQ and with summer comes the abundance of local fruit.  To make the most of the residual heat in your BBQ, why not stick a pudding to cook on it while you are tucking into your meat.  Here’s her recipe for a ‘skillet pan cake’ which would work well with any fruit such as nectarines, peaches, plums, apples or pears.  Sue’s used rhubarb as it’s in season. For this recipe Sue used a 30cm diameter skillet pan

      Rhubarb Skillet Pan Cake

      • Prep Time30 min
      • Cook Time1 hr
      • Total Time1 hr 30 min
      • Yield4 Servings

      Ingredients

      • 500g rhubarb, washed and cut into chunks
      • Zest & juice of one large orange
      • 2 tbsp light soft brown sugar
      • 2 tbsp honey
      • 30g unsalted butter

      For the cake topping:

      • 175g SR Flour
      • 1 tsp baking powder
      • 175g caster sugar
      • 175g unsalted butter (room temperature)
      • 3 eggs

      Method

      1

      Place the rhubarb and all the other ingredients into the skillet pan and place over indirect heat on your BBQ and poach gently for about 30 minutes or until the rhubarb is just soft.

      2

      While the rhubarb is cooking, it’s time to make the topping.

      3

      In a bowl place all the ingredients together and using an electric mixer, beat for 3 minutes so the mixture is light and fluffy.

      4

      Take the skillet pan off the heat and carefully put the cake mixture on top of the poached rhubarb in small spoonfuls to begin with.  Be careful that the liquid doesn’t spill over.  It will soak into the cake mixture during cooking.  Continue spooning over the mixture until the fruit is covered.

      5

      Cook for about an hour.  Test it with a skewer – if it comes out clean, it’s done.

      6

      Serve straight to the table and use a big spoon to dish it up.  Serve with cream or ice cream

      I cooked this in my Kamado Joe using indirect heat.  I have the grills on the top setting and had the temperature at about 150C.  When baking in the KJ, I upturn an old baking tin and sit the skillet pan on top of this to give the pan a bit of height from the heat of the grill so that the base doesn’t over cook.

      Free Recipe Card

      Rhubarb Skillet Pan Cake

      Download the free PDF Recipe Card