BBQ-Toro Stainless Steel Rib Rack Holder

I’ve been cooking ribs various times for a few years now and when I need to cook 6 racks, it takes up virtually all the space in my Weber Smokey Mountain 57cm, so no room for any more meats.

I’ve tried a few things over the years to act as a rib rack, a rib roast holder upside down, the IKEA pot lid organiser but they weren’t up to the job.

A quick search on the internet I found the BBQ-Toro Stainless Steel Rib Rack Holder. This looked sturdy and ideal for my needs. Ordered from Amazon (check availability) end of May 2020 it arrived a few days later. Looking at the reviews on Amazon, some people complained that the edges were razor sharp so be careful when using. I must admit some edges were a bit sharp but nothing I really worried about and not as bad as the reviews claimed.

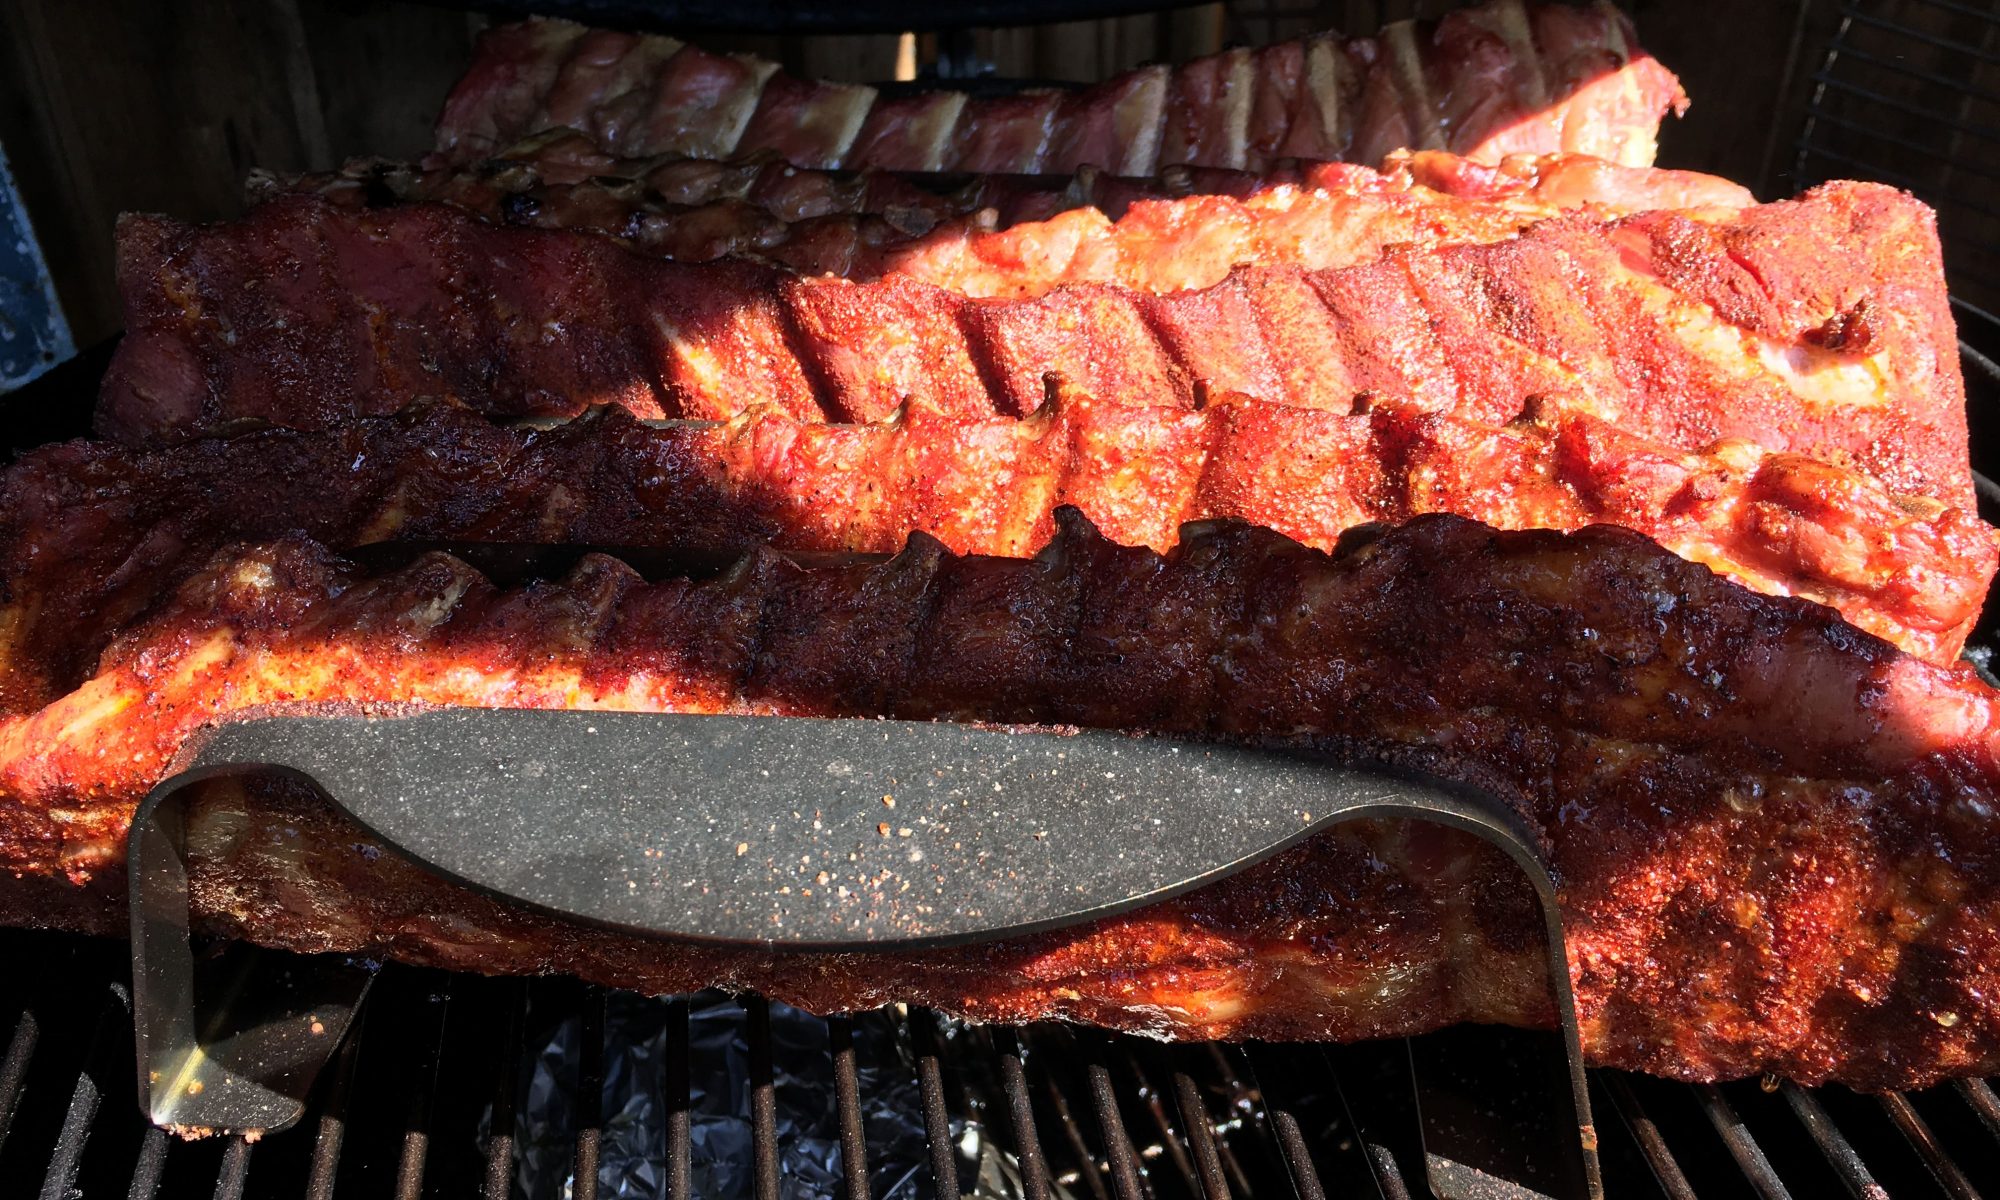
I prepped 6 racks of baby back ribs (sourced from Costco), applied some French’s mustard to them and sprinkled my favourite rub over them. I let them sit for 20 mins whilst the smoker was coming to temperature. Then on goes the rib rack holder followed by all 6 racks. The racks slotted in perfectly with a little overhang at each end. I was worried at first that it maybe too big to close the lid with all 6 racks in, but I didn’t need to, as it closed just fine.

The ribs held perfectly over the duration of the cook and left me with a whole rack on the lower part of the WSM free so I could cook other meats if I needed to.

Overall this rib rack holder is a great solid piece of kit and I will be using it a lot now when cooking baby backs. I haven’t tried with spare ribs, but I’m pretty sure I won’t be able to get 6 racks on the top shelf. I would probably cook on the lower rack shelf and remove the upper, which should do the trick.

Unfortunately at the time of writing this review it seemed to be out of stock on most places online, if you can find it and are looking for a rib rack, I highly recommend this rib rack holder.

BBQ Stu
Twitter  –  @bbqstuuk
Instagram  –  @bbqstuuk

Note: I was not paid to review or gifted this rib rack holder. I purchased it full price from Amazon.

Buttermilk Wings

Buttermilk Wings

  • Prep Time30 min
  • Cook Time40 min
  • Total Time1 hr 10 min
  • Yield2-3 Servings
  • Cuisine
    • American
  • Cooking Method

Ingredients

  • 1kg wings
  • 100 gms of Tropics Foods Texas BBQ chicken fry mix
  • (OR 30g BBQ Rub ,10g baking powder ,10g self raising flour )
  • 1/2 pint buttermilk with a generous shake of hot sauce
  • Favourite BBQ sauce, we used Red Dog Texas Chipolte which has a nice kick.

Method

1

Soak the wings overnight in the buttermilk overnight, if you can’t get buttermilk you can use 250ml milk with 1tsb of lemon juice. (I like to separate the wings at the joint, but you can leave them whole if desired. )

2

After marinating take them out of the milk, drain but don’t pat dry.

3

Toss your wings in the chicken fry mix. Put them on a rack on a plate and leave in the fridge to dry for 30 mins.

4

Set up your bbq for indirect cooking and heat to around 350°F or 180°C.

5

Cook for 40 mins..

6

Check internal temp is 165°F or 74°C

7

Remove from bbq, and toss in a sauce of choice. Serve with blue cheese sauce and celery

Recipe from Chillin N Grillin NI.

Free Recipe Card

Download the free PDF Recipe Card

Gambas Pil Pil

Gambas Pil Pil (Chilli and Garlic Prawns)

If you have ever been to spain you will most likely have seen this on the menu.
Its such an easy dish to recreate and works great on the BBQ.

Gambas Pil Pil

  • Prep Time15 min
  • Cook Time10 min
  • Total Time25 min
  • Yield2 Servings
  • Cuisine
  • Course
    • Appetizer
  • Cooking Method
    • Direct in Pan

Ingredients

  • 60ml of olive oil
  • 1 garlic clove sliced
  • 1/2 tsp of chilli flakes (or more if you like it hotter)
  • 200gms freshwater prawns (you can use tiger prawns but this is traditionally made with smaller juicer prawns)
  • A pinch of parsley (Optional)
  • Toasted sourdough bread to serve

Method

1

Heat the oil in a heat proof dish on the bbq

2

Add the sliced garlic and chilli and cook until sizzling

3

Toast the bread

4

Add the prawns and cook until they start to give out the juice (this is what helps make a delicious dipping sauce for the bread)

5

Sprinkle with parsley and serve along side the bread

Free Recipe Card

Download the free PDF Recipe Card

BBQ Hake with Langoustines

BBQ’d Hake, lightly smoked Kilkeel Langoustines, charred new comber baby potatoes, and grilled asparagus spears, blow torched chorizo & herb butter.

Dean Coppard is a well known chef in Northern Ireland, He is currently head chef at the Sweet Afton Bar and Kitchen. He grew up in Queensland Australia.

As he lived so close to the beach his father went fishing and brought home some amazing fresh fish which they barbecued. He moved to Northern Ireland in 2005 became head chef of the well known Yellow Door and then opened Uluru Bistro, an Australian restaurant in Armagh, it was recognised in the Michelin guide with 2 knife and forks.

He is an avid supporter of local suppliers and believes that Northern Ireland suppliers are going from strength to strength. He still lives in Armagh with his wife and 2 children who love eating out.

Although this recipe is cooked on a Mini Kamado, its easily adapted to other BBQ’s as its just Direct and Indirect grilling.

BBQ Hake with Langoustines

  • Prep Time30 min
  • Cook Time15 min
  • Total Time45 min
  • Yield2 Servings
  • Cuisine
  • Cooking Method
    • Direct / Indirect

Ingredients

  • 2 x 240g of fresh hake, skin on, scaled, pin boned.
  • 6 whole langoustines, split in half length ways.
  • 300g of new baby potatoes.
  • 6 tips of asparagus
  • 200g of butter
  • 100g of chorizo
  • 4 sprigs of fresh coriander
  • 50ml of Broighter Gold Hickory Rapeseed Oil

Method

1

Using a direct and indirect set up, light the bbq

2

Once the temperature is sitting between 180-200°C oil the grill barred grill rack and place the hake fillets skin side up over the direct heat area

3

Close the lid with the vent set to fully open and bake for 6 mins.

4

Open the lid and using a pallet knife or fish slice gently loosen the fish off the grill rack and set over the in-direct heat area.

5

Preboil the new potatoes until just cooked or still firm, remove from pan and slice into 1-2cm thick discs, coat these and the asparagus spears in a good quality rapeseed oil, I used the Broighter Gold Hickory Smoked infused oil giving the veg a rich flavor that gives depth once heated.

6

Add to the grill and place the halved langoustine on top. Cook for a further 4mins.

For The Butter

7

Soften the butter and add to a food processor blitz with the chopped chorizo and fresh coriander, roll in grease proof paper to form into a log shape and rest in the fridge

To Plate

8

Place the cooked potatoes on the plate first, rest the hake on top add the asparagus then finish with the grilled langoustine and slice the butter on the langoustines and blow torch the butter until it melts covering the langoustine and the hake.

Free Recipe Card

Download the free PDF Recipe Card

Make Your Own Bacon

If you haven’t tried curing your own bacon, a kit is a good place to start. We got this one from The Smokey Carter who kindly shared their instructions with us. There are a number of other companies who make bacon kits in a variety of flavours

I normally cold smoke my bacon in the winter but as it is too warm due to the summer months I thought I would start with the smokey hickory bacon cure.

The Smokey Carter Bacon Cure kits are available from here

Make Your Own Bacon

    Ingredients

    • The bacon curing kit contains enough cure to make 4kg of bacon and has two different flavours.
    • The following recipe is based on making 1kg of bacon at a time, so you will only require half a pot of cure (40g) per 1kg of pork.

    Curing Kit Contents

    • Curing Time: 7 Days
    • Make Your Own Bacon with bacon Hone Curing Kit
    • Curing Kit Contents
    • 1 x 80g Fennel & Lemon Pepper Bacon Cure
    • 1 x 80g Smokey Hickory Bacon Cure
    • 2 x 60cm of muslin mutton cloth
    • 2 x curing bags
    • 4 x plastic gloves

    What you will need in addition to the kit (not included)

    • 4 x 1kg of pork. Only 1kg of pork is required per batch. Use belly pork for streaky or pork loin for back bacon.
    • Sharp knife
    • Kitchen roll
    • Wire rack

    Method

    Home Curing Instructions

    1

    You can visit your local butcher for your pork, although even supermarket pork makes great bacon.

    2

    You need 1kg of either belly pork or pork loin, depending on the type of bacon you want to make. Belly makes streaky and loin makes back bacon.

    3

    Wash your hands thoroughly, put on a glove and place the pork into a plastic curing bag.

    4

    Pour in 40g (half a pot) of your chosen cure and massage into the meat to ensure the cure has covered the whole piece of meat. Seal the bag ensuring that there is no air left in the bag.

    5

    Place the bag in the fridge and leave undisturbed for two days.

    6

    Turn the bag over and leave for a further two days in the fridge.

    7

    After four days in the cure you will notice the meat will have slightly firmed up. Put on a glove, remove from the bag and rinse the pork under a cold running tap. Discard the plastic bag.

    8

    Dry the meat with a few pieces of kitchen towel, ensuring most of the moisture is soaked up.

    9

    Take a piece of the mutton cloth and place the meat inside, folding the edges underneath.

    10

    Place a wire wrack on a shelf in the fridge and place the wrapped pork on the rack. Leave undisturbed in the fridge for three days.

    11

    Unwrap the mutton cloth and slice off the required amount of bacon with a sharp knife. Cook and enjoy. Congratulations, you’ve made bacon!

    12

    Re-wrap the remaining bacon in the muslin and keep in the fridge for 4-6 days. Slice as you go.

    13

    You can also slice the bacon and freeze to use at your convenience.

    Tips
    If you like your bacon more salty you can leave it in the cure for an extra day.
    The mutton cloth can be cleaned in the washing machine and re-used to make another batch with the remaining cure.