Jumbuck Rondo – Review by Ady

For this years UKBBQWEEK I decided yet again to try out another affordable BBQ.

I had a look in several stores and online and decided to purchase a Jumbuck Rondo Rotisserie from Homebase. They are usually on sale at £65.00 but I fell lucky and picked one up for the bargain price of £50.00 !!! I swiftly returned home and opened the box, nice easy to understand instructions, really easy to build.

So the hardware.

  • Easy to build.
  • Nice and solid when built.
  • Very workable grilling area.
  • Rotisserie motor is really quiet and powerful, with the added bonus of a balance weight.
  • Could easily be popped in the boot of a car and taken on a picnic or camping trip, all you would require is a battery rotisserie motor.
  • Superb value for money.

Right, all looking good,so how does it perform?

The first cook,

I marinaded overnight some boneless, skinless chicken thighs using the Tandoori Chicken recipe by Dan Toomes (@thecurryguy)

Amelia lit two Heat Beads firelighters and a chimney starter was placed on top filled with half a chimney of Heat Beads. Whilst the Heat Beads charcoal briquettes was coming up to temperature I threaded the chicken on to the rotisserie. I then placed the rotisserie on the Rondo without the motor and span it so it ran freely and let it settle, then place the weight on the opposite side and spin until balanced. I then dumped the coals on to the heat deflector and I used a foil tray to creat a two zone set up.

The skewer was placed on to the rotisserie and engaged into the motor, switched on the rotisserie and let it do its thing.

After 30 mins I realised that I didnt need the two zone set wasnt necessary, because it doesn’t have a lid the direct method works a treat. I tested the temperature using a thermapen until it read 74c in several locations, switched off the rotisserie and removed the chicken. I removed the skewer and the holding forks and placed on a plate and covered loosely and let rest.

Popped a flatbread on the Jumbucks grill and warmed through, popped on some of the chicken and voila.


Conclusion

The Jumbuck Rondo is and amazing priced piece of BBQ equipment, and the price point is a bargain I’d happily give it 8 out of 10, but if Jumbuck gave this little grill a lid it would be a 10 out of 10.

Just for clarity I purchased all of the equipment and the views are my own.

Rib of Beef

Rib of Beef

The Next Cook

Budget Q is back again, and this time we are cooking a Rib of Beef.

Modifying the BBQ

After using the BBQ last time I found that the air intake blocked very quickly with ash, so I’ve modified it with a cut down sieve to try and improve matters,

We will be cooking the beef using a two zone system and finishing the beef off on the direct side (called reverse sear).

Cooking the Rib of Beef

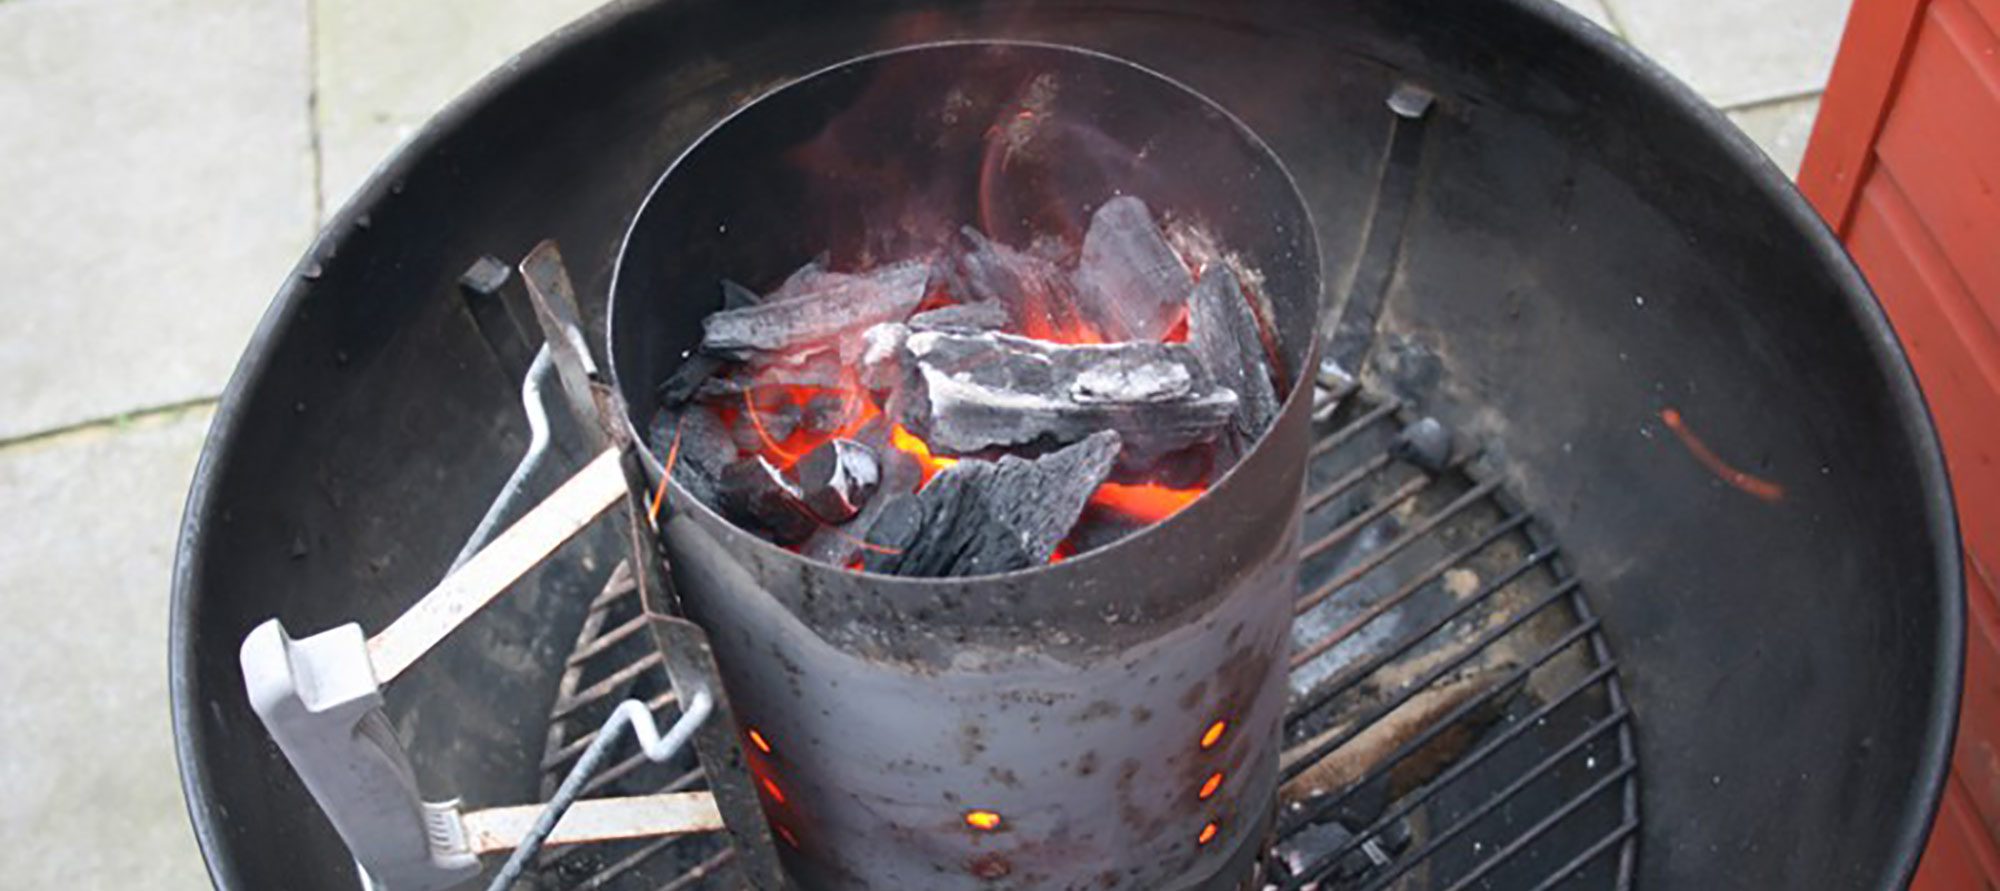
Fill the chimney starter with charcoal and light a eco fire underneath and in 15 -20 minutes we will be ready to go.

Meanwhile I am going to setup the BUDGET thermometers. These were purchased from Aldi they retail at £12.99, but I got these on sale for £5.00, YES a fiver each ………. Bargain!

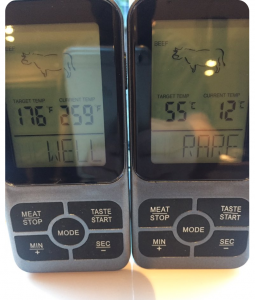
They are a single probe and they can be changed from centigrade to fahrenheit and are wireless. The base unit stays near the BBQ and the readout unit goes anywhere convenient.

I ran one thermometer for the pit temp and the other was monitoring the beef temp. I tested them together because I didn’t think they would side by side but worked very well.

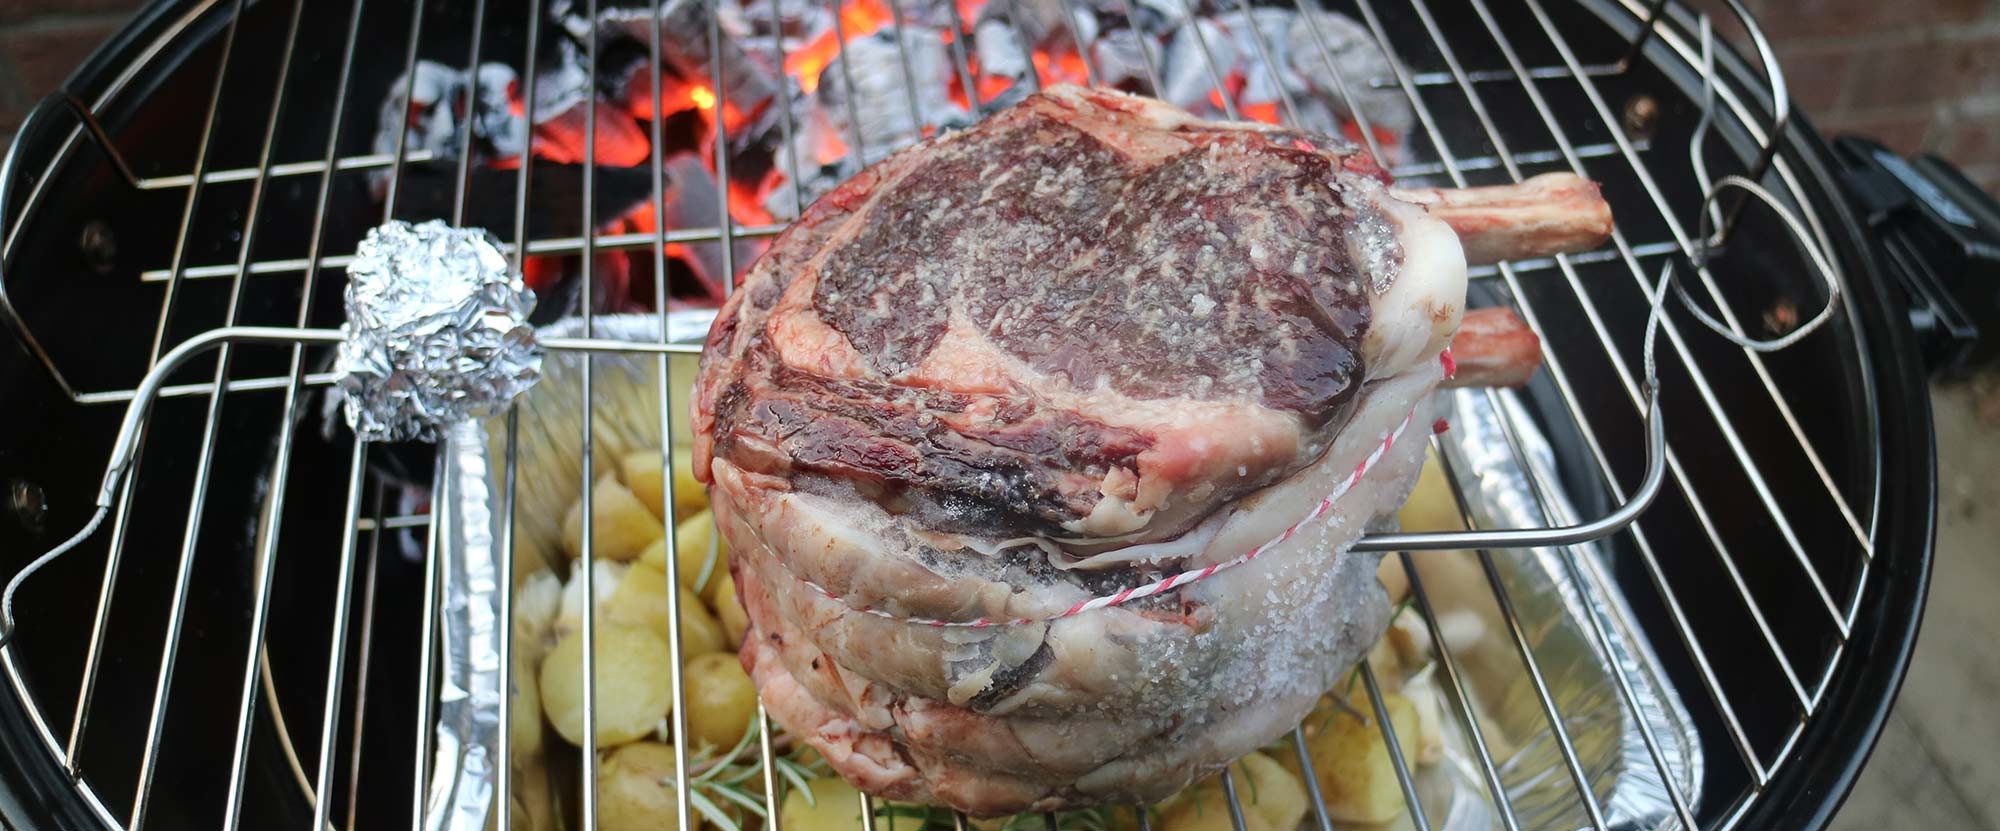
I also prepared a few potatoes and popped in a tray with a bit of olive oil and salt to sit under the Rib of Beef.

When the charcoal is up to temperature carefully pour the coals onto the fire grate. Pop in small piece of your wood of choice – I went cherry.

Don’t get carried away with smoking wood. It’s easy to oversmoke. Less is more guys!

Pop on the cooking grate, insert the pit temperature probe through a screwed up piece of kitchen foil to keep it were it needs to be.

Next put the lid on and watch the pit tempature rise up to 225 / 250 f (107 / 121c).

Control the temp by opening or closing the air dampers on the bottom , leave the exhaust damper on the lid wide open.

When up to temperature open the lid and quickly pop on the meat. Push in the meat probe and quick as you can pop the lid back on making sure the exhaust damper is over the meat (so the smoke flows over the meat).

Now just relax………keep an eye on the temperatures and adjust damper accordingly. If you’re anything like me you can now tidy up the trail of destruction left behind in the kitchen.

Note on temperatures, don’t get stressed or hung up. If it goes up to 275f (135c) even 300f (149c) don’t panic and close the intake damper all the way. It’s just like steering a boat, steer and minutes later it turns ,just make slight adjustments and wait. If it goes down and the vents are wide open pop some more charcoal into your chimney and light, then pop in the BBQ.

When the meat temp reaches 120f (49c) lift off the lid and move the meat over to the hot direct side and brown on all sides until the internal temp is 135f (medium rare) 57c.

Take off the beef, lift the cooking grate and remove the potatoes and serve.

Rest the beef for 10 minutes, which allows the meat to reabsorb the juices.  As the chef you need to ensure you get the first slice – just for testing purposes of course.

Enjoy…….


Basic BBQ Tips: The Chimney Starter

Chimney Starter
Strangely in life the harder the things you learn to do the easier it to forget how you did it, remember riding a bike?
BBQ is just the same!
The hardest thing I found was lighting the BBQ. Open the bag of charcoal put directly into the BBQ then squirt with lighting fluid, BOOM big ball of flames and two minutes later it goes out, add more fluid and fan the flames, moving charcoal about and burning your fingers whilst having helpful comments like “people are arriving in 15 minutes”.
If this sounds familiar read on …..

Enter the game changer, the humble chimney starter. My preferred method is fill the chimney starter with charcoal (lump or briquettes) but never instant light charcoal.
Light two eco firelighters and pop the chimney starter on top. Twenty minutes later you have perfect lit charcoal ready for instant use….that easy
Wow they must be pricey? Cant be that easy? Well most cost between £8 – £20 and last for ages, and it really is that simple, like riding a bike….