Meatball Pasta Bake

Meatball Pasta Bake

  • Prep Time20 min
  • Cook Time45 min
  • Total Time1 hr 5 min
  • Yield4 Servings
  • Cooking Method
    • Direct /Indirect

Ingredients

  • 400gms of burgers (this is an easy way to make meatballs as you don't need any binders)
  • 300gms of Pasta
  • 350gm Jar of Cirio Passata Rustica
  • 1 red onion chopped
  • 1 red pepper chopped
  • 100gms mushrooms sliced
  • 2 teaspoons of mixed herbs (we brought this mix home from our holiday in Rome but any herbs will do, such as dried garlic, rosemary, time, oregano, chilli flakes)
  • Salt and Pepper
  • 75 gms of grated mature cheddar
  • Olive Oil

Method

1

Boil the pasta for about 2 mins less than the time suggested on the packet, drain and set aside.

2

Light the bbq and allow it to come to around 180°C. (If using a kettle then set up for direct and indirect cooking)

3

Add oil to a cast iron pan, heat on the bbq and fry the meatballs until they start to brown, remove from pan and set aside

4

Fry the onion and pepper in the pan until it starts to soften, add the mushrooms and the herb along with some Salt and Pepper (you might need a little extra oil)

5

Fry for a couple of minutes and add the passata, mix well

6

Combine the meatballs and the sauce and simmer for 5 mins

7

Combine the pasta and the sauce and place in a baking dish, cover with cheese

8

Put the deflector plates in if using a ceramic or if using a bbq then cook indirect.

9

Bake the pasta bake for 20-30 mins until its bubbling.

Free Recipe Card

Meatball Pasta Bake

Download the free PDF Recipe Card

BBQ Dragon and Chimney of Insanity

The BBQ Dragon and Chimney of Insanity have been around a few years in the states and not really available here until now. Here’s a review from Mark Quigg (@Markie_q_bbq)

Those of you that follow me on social media, will be aware that I am a big fan of plancha cooking and have a great relationship with Smokerig and their sister site Totally BBQ. A few weeks ago, we were chatting about a new kettle BBQ they will be stocking when it is released in the coming months. They mentioned a new product that they had just managed to get hold of from America.

That product was the BBQ Dragon and the Chimney of Insanity. I must admit I had never heard of them, but they very generously offered to send them to me to play with. Just to clarify, they have at no point asked me to review the products, or promote them in anyway. I am free to give my honest opinion.

The BBQ Dragon is a stainless steel, battery powered variable speed fan on a flexible neck. At the other end is a heavy-duty rubber lined bulldog clip to fasten it, so it is completely hands-free. It has a variety of uses, from lighting fires, increasing temps, to recovering smouldering fires.

    The Chimney of Insanity’s design from the outside looks like most chimney starters, apart from the protruding hole on one side, towards the bottom of the chimney. When you look inside, the charcoal grate is not conical, but flat and you can see that the hole that protrudes for the side, is actually a 90-degree elbow joint. The concept is that you place a firelighter in the elbow joint and this causes a large draw of air up through the coals.

    But this is where they come into their own. The hole is the exact size of the BBQ Dragon fan head, which slots into the hole on the chimney and transforms it into more of a rocket stove. On my first use, I lit a chimney full of new Weber briquettes in 4 minutes and 32 seconds. No mean feat. It’s capacity is slightly less than a Weber chimney starter, probably around ¾ the size. This isn’t an issue for me as I rarely used to light a full chimney.

    Since then I have been experimenting with them both and having a lot of fun.  I have used the BBQ Dragon at the end of cooks to bring the temperature of the coals up, so I have an intense sear zone. This is great with a Slow N Sear. It’s worked well with my Kadai Fire Bowl, on some Oak wood that has always previously really struggled and always smouldered. It has also worked with my Ooni 2S, to fire up the pellets quicker and in between pizzas to keep the temperature up. All of which it has handled with ease.
    I’ve used the Chimney of insanity with a grate across the top, with the BBQ Dragon on and cooked some proper flame grilled steaks. On YouTube others have also used them as a Wok burner.

    I am very impressed with them so far. The build quality seems great. It’s the first chimney starter I have used where the handle doesn’t even get slightly warm. The BBQ Dragon runs on 4 x AA batteries. It does have a micro USB socket on the handle, so you can trickle charge rechargeable batteries if you like.

    So do you need one in order to be able to BBQ?  No.  But do you want a quicker method of lighting your BBQ, that’s portable, handsfree and can help searing, fire management, pizza making etc? Then I would recommend checking it out. It’s one of those gadgets that once you have it, you wonder how you ever coped without it. The BBQ Dragon and Chimney of Insanity are available separately or as a bundle on www.tbbq.co.uk.  Feel free to get in touch on Twitter or Instagram (@Markie_q_bbq) if you want any more information.

    SNS Grills – Slow ‘N Sear

    What is a Slow ‘N Sear I hear you ask. Basically it turns your kettle bbq into a smoker to allow you to cook food at a low temperature. Pulled pork is a great example. Normally cooked at 110°C (225°F) over many hours which is not easily achievable on a kettle without a lot of baby sitting.

    I bought this a while ago from Totally BBQ after watching a load of YouTube videos and being initially attracted by how easy it looked. I’ve seen numerous basket set ups and snakes etc in the Weber that will do a similar job but this seemed a lot easier to use, so the Slow ‘n Sear 2.0 was ordered.

    Arrived and unboxed, first impressions were a well-made sturdy piece of stainless steel which fitted perfectly in my Weber 57. The coals obviously go in the back and the water baffle is filled with hot water.

      The instructions said to start a few coals in one end of the basket as shown above. (I now just start some in my small weber chimney and stack in when hot). Once initial coals are going, fill with more fuel and then I filled the baffle with water from a boiling kettle. Add a couple of bits of your favourite wood on and your good to go.

      The baffle can be removed if you just want to use it with charcoal for a sear zone of for indirect cooking.

      Once the  lid was on it didn’t take long for it to approach the desired temp of 110°C (225°F) and then just cracking the bottom vent and the top vent slightly open, it didn’t need much tweaking for it to stay around there for the next 8 hours.

      Just for information I was using Cococabana Grillbriketts

      Here’s them at 3 hours, 6 hours and 8 hours respectively. The temp was easy to maintain with just a little vent tweaking now and again.

      I’ve now used this on a quite few cooks and been more than pleased with it. To be honest it doesn’t really come out of the BBQ unless I’m using the Fuel Dome for wings. As there’s only two of us at home now, I even got rid of a couple of smokers that now just weren’t being used.

      There’s a few extras available for it like a griddle pan and a rotating rack with a bigger flip up portion for adding coals.

      For me, I really like it and if anything happened to it, I’d definitely replace it in a heartbeat.

      Available from Totally BBQ.

      Baked Prawns

      This is a popular one pot dish served throughout Turkey. The recipe, comes from the book Ozlem’s Turkish Table by Ozlem Warren and has been adapted for cooking on the BBQ.
      I’ve  only had the book a couple of months and have marked quite a few recipes to cook on the BBQ.  Ozlem kindly gave permission to reproduce this recipe. Below is the link to her book,

      Baked Prawns

      • Prep Time15 min
      • Cook Time30 min
      • Total Time45 min
      • Yield4 Servings
      • Cuisine
        • Mediterranean
      • Course
      • Cooking Method
        • Direct/InDirect

      Ingredients

      • 225gms Raw King Prawns (shelled)
      • 225gms mushrooms, cleaned and sliced
      • 1 onion thinly sliced
      • 2 garlic cloves
      • 1 green pepper
      • 2 bay leaves
      • 400gms tin of chopped tomatoes
      • 60ml water
      • 120gms grated chedder
      • 3 tbs olive oil
      • salt and pepper to taste
      • 2 tsp turkish red pepper flakes (pul biber) or chilli flakes if you can't get them
      • Handful of fresh parsley
      • Flat breads or sourdough to serve

      Method

      1

      Preheat the BBQ to 180°C and set up for indirect.

      2

      Heat the olive oil over the coals, and stir in the onion, peppers and mushrooms cook for about 4 to 5 mins until they begin to soften

      3

      Add the garlic, season with salt, pepper and red pepper flakes cook for another 4-5 mins

      4

      Add the chopped tomatoes, bay leaves and water, combine well

      5

      Simmer for about 10 mins until the sauce starts to thicken

      6

      Stir in the prawns sprinkle with grated cheese, move to indirect heat, cover the pan or the bbq with a lid and bake for 10 mins until prawns are cooked and the cheese is nicely melted.

      7

      Garnish with chopped parsley and serve hot with bread of your choice

      Free Recipe Card

      Baked Prawns

      Download the free PDF Recipe Card

      Ozlem Warrens book ‘Ozlems Turkish Table’ is available from all good bookshops.
      OURMAND World Cookbook Awards WINNER and BEST IN THE WORLD, Heritage: Turkey. Foreword Indies Awards (USA, International) HONORABLE Mention for Cooking.

      ISBN-10: 1912031949
      ISBN-13: 978-1912031948

      Grilled Sea Bass

      Grilled Whole Sea Bass Chreime with ginger and coriander relish
      Chreime is a Tunisian fish stew but in this recipe bbq-ing the fish adds a depth of smoke flavour

      Grilled Sea Bass

      • Prep Time10 min
      • Cook Time20 min
      • Total Time30 min
      • Yield2 Servings

      Ingredients

      • 6 garlic cloves peeled and roughly chopped
      • 1tbsp salt
      • 1 1/2tsp caraway seeds toasted in a dry pan and ground in a spice blender
      • 1 tsp cumin seeds toasted in a dry pan and ground in a spice blender
      • 100ml olive oil
      • 2tbs smoked paprika
      • 1/2 tsp cayenne pepper
      • 50g tomato paste
      • 1tbsp red wine vinegar
      • 1tsp sugar
      • 1 sea bass approximately 700gms scaled and gutted.
      • Juice of 1 lime

      Method

      For the Ginger and Coriander Relish

      1

      Combine all the ingredients in a bow, season to taste with salt and pepper and set aside

      For the Chreime

      2

      Crush the garlic with the salt, caraway and cumin and garlic in a pestle and mortar, add a table spoon of olive oil, the paprika and cayenne pepper and stir to combine

      3

      Heat the rest of the oil in pan over medium heat, add the garlic and spice mix and fry stirring frequently to avoid burning.

      4

      Bring to a gentle simmer then add the vinegar and sugar. Taste and adjust seasoning if needed. Keep warm.

      5

      Score the sea bass on each side and drizzle with oil, season with salt and pepper

      6

      Set the bbq up for direct grilling, once ready grill your sea bass for 3-4 mins a side, it should be opaque and slightly firm when ready.

      7

      Put sea bass into sauce and bring to a gentle simmer spooning some sauce over to finish the cooking.

      8

      Serve with the relish spooned over and straight from the pan.

      9

      Some toasty crusty bread and a green salad make great sides

      Free Recipe Card

      Grilled Sea Bass

      Download the free PDF Recipe Card

      Dirty Scallops with Nduja and Wild Garlic Butter.

      Nduja is a soft spicy salami from Italy which melts and compliments the flavour of the scallops.

      If you’re cooking this on a charcoal BBQ please ensure you’re using Lumpwood charcoal.

      This is a recipe from Steve Johnson who is a passionate and experienced bbq chef from Brixham Devon , winner of PenGrille 2018, demonstrator and pop up bbq chef, specialising in fish and shellfish.

      Dirty Scallops with Nduja and Wild Garlic Butter.

      • Prep Time10 min
      • Cook Time10 min
      • Total Time20 min
      • Yield4 Servings

      Ingredients

      • 12 scallops in the half shell
      • Nduja approximately 80-100g
      • Wild garlic butter
      • Pastis such as Pernod

      Method

      1

      Ask your fishmonger to sell you scallops in the half shell. These may need to be ordered in advance.

      2

      I make wild garlic butter each spring using 80g of fresh wild garlic leaves to 250g of butter and half a tsp of sea salt. Portion and freeze for use later. If wild garlic butter isn’t available use normal garlic instead.

      3

      Have your coals hot and spread evenly. Add a knob of Nduja and wild garlic butter to each scallop shell.

      4

      Place the scallops directly on the coals. The scallops are cooked when the Nduja and garlic butter are melted an the internal temperature of the scallops is 50°C. Just before removing add a dash of pastis and flambé. I recommend the use of a protective glove for this.

      5

      This dish may be cooked on a conventional charcoal or gas bbq.

      6

      The scallops may be substituted for fresh oysters which are also delicious cooked this way.

      Free Recipe Card

      Dirty scallops with Nduja and Wild Garlic Butter

      Download the free PDF Recipe Card

      Susan Stoneman – Hot Cross Buns

      Susan Stoneman – Hot Cross Buns

      • YieldMakes 12 (depending on size)

      Ingredients

      • 300ml milk
      • 50g butter
      • 500g strong bread flour
      • 1 tsp salt
      • 75g caster sugar
      • 7g sachet fast-action or easy-blend yeast
      • 1 egg, beaten
      • 75g sultanas
      • 50g mixed peel
      • (or 125g dried mixed fruit for the dried fruit ie. Sultanas & mixed peel)
      • zest 1 orange
      • 1 apple, peeled, cored and finely chopped
      • 1 tsp ground cinnamon
      • 1 tsp ground mixed spice
      • For the crosses - 75g plain flour, plus extra for dusting
      • For the glaze - 3 tbsp apricot jam or orange marmalade

      Method

      1

      Gently warm the milk and add the butter. Stir to help it melt. Leave to cool until it reaches hand temperature.

      2

      Put the flour, salt, sugar and yeast into a bowl. Make a well in the centre. Pour in the warm milk and butter mixture, then add the egg.

      3

      Add in the dried mixed fruit, apple, orange zest, ground cinnamon and mixed spice.

      4

      Using a wooden spoon, mix well, then bring everything together with your hands until you have a sticky dough.

      5

      Tip on to a lightly floured surface and knead for about five minutes until smooth and elastic.

      6

      Put the dough in a lightly oiled bowl. Cover with oiled cling film and leave to rise in a warm place for 1 hr or until doubled in size.

      7

      Divide the dough into 12 even pieces the roll each piece into a smooth ball on a lightly floured work surface.

      8

      Cover with more oiled cling film, or a clean tea towel, then set aside to prove for an hour (or until doubled in size).

      9

      To make the crosses on the buns, mix the 75g flour with about 5 tbsp water to make a paste – add the water 1 tbsp at a time, so you add just enough for a thick paste.

      10

      Spoon into a piping bag with a small nozzle and then pipe crosses on the buns.

      11

      I cooked the buns in the Kamado Joe for about 30 mins at 150°C (using the deflector plates and cooking on the top grill). Usual bake test, brown on top and sounding hollow when tapped on the base of the buns.

      12

      Gently heat the apricot jam to melt, then sieve to get rid of any chunks and while the jam is still warm, brush over the top of the warm buns and leave to cool.

      13

      Gently heat the apricot jam to melt, then sieve to get rid of any chunks and while the jam is still warm, brush over the top of the warm buns and leave to cool.

      14

      Gently heat the apricot jam to melt, then sieve to get rid of any chunks and while the jam is still warm, brush over the top of the warm buns and leave to cool.

      Recipe from Susan Stoneman

      Hot Cross Buns

      Download the free PDF Recipe Card

      Napoleon PRO Charcoal Grill- Review by Tim Donald, @silverbackgrill

      Napoleon PRO Charcoal Kettle Barbecue (PRO22K-LEG-2)

      First impression was “man this thing is a weighty bit of gear”. On unpacking, it is not difficult to understand why. Not only is there a heavy gauge porcelain lid and bowl, but also, a hugely impressive cast iron hinged cooking grid that weighs 8kg on its own! Assembly is fairly straight forward, just be sure to get the legs in the right place. During assembly I was struck by a couple of things:

      1) There is a huge hole in the bottom of the porcelain bowl. Surely, there is no way you are going to be able to control air flow with that.
      and
      2) The steel band that fits to the bowl is a great aesthetic feature, but its thinner than the porcelain and probably more conductive so you are going to lose a load of heat and what does it really add apart from looking pretty.

      Well I couldn’t really have been more wrong! The ash catcher slots in to the bottom of the bowl and ingeniously doubles up to regulate the air flow. This design has the advantage of doing away with more fragile moving parts and also making it incredibly easy to clean out the bowl after use.

      The steel band is a really nice feature on the grill. It is also integral to being able to adjust the grill to three different heights, as the bowl is then the same width over a greater range, allowing a 14cm height differential. This gives you more control when cooking and also allows you to drop the grill right above the coals when searing. As for losing heat through the band, well I can find no evidence of that.

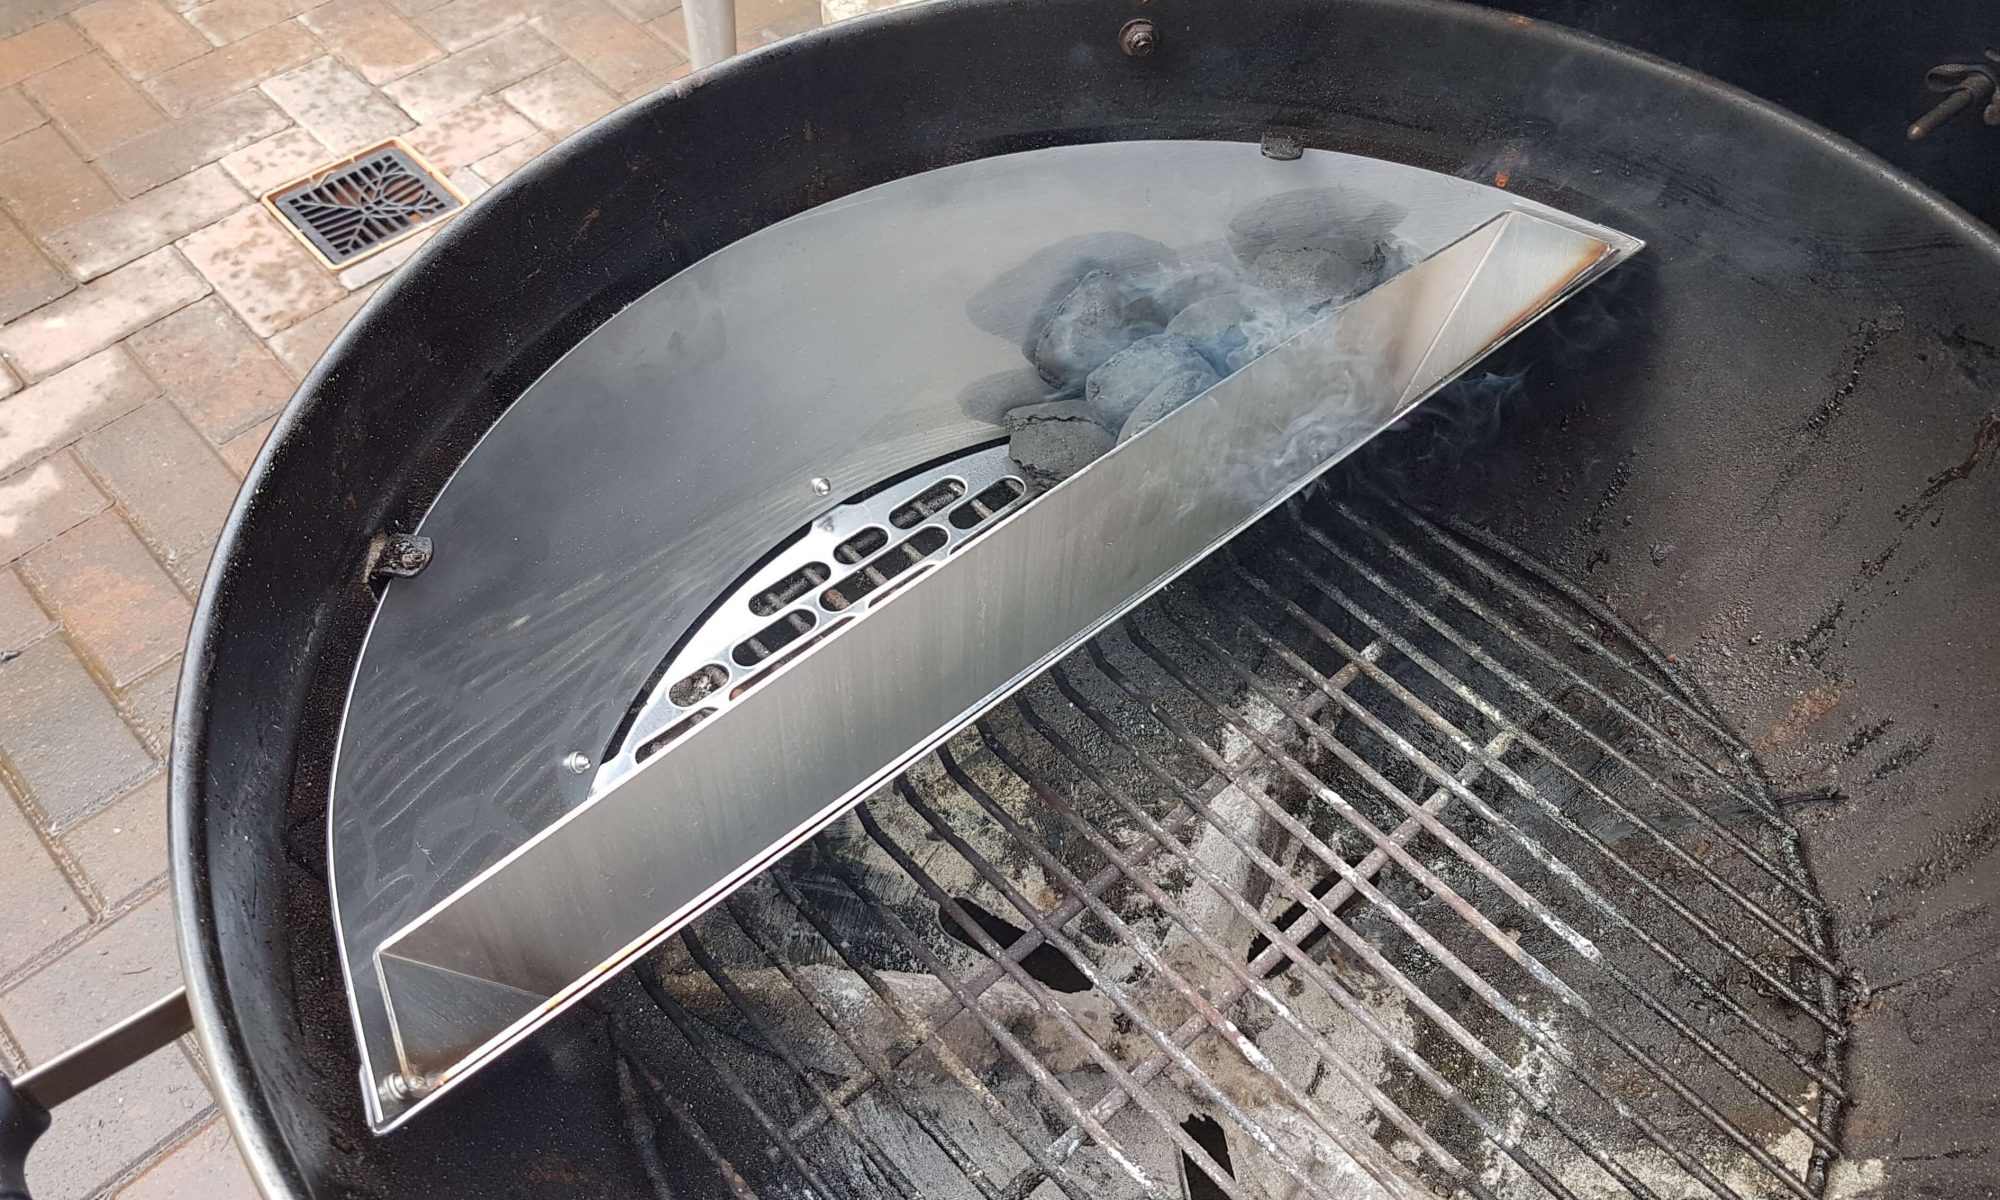
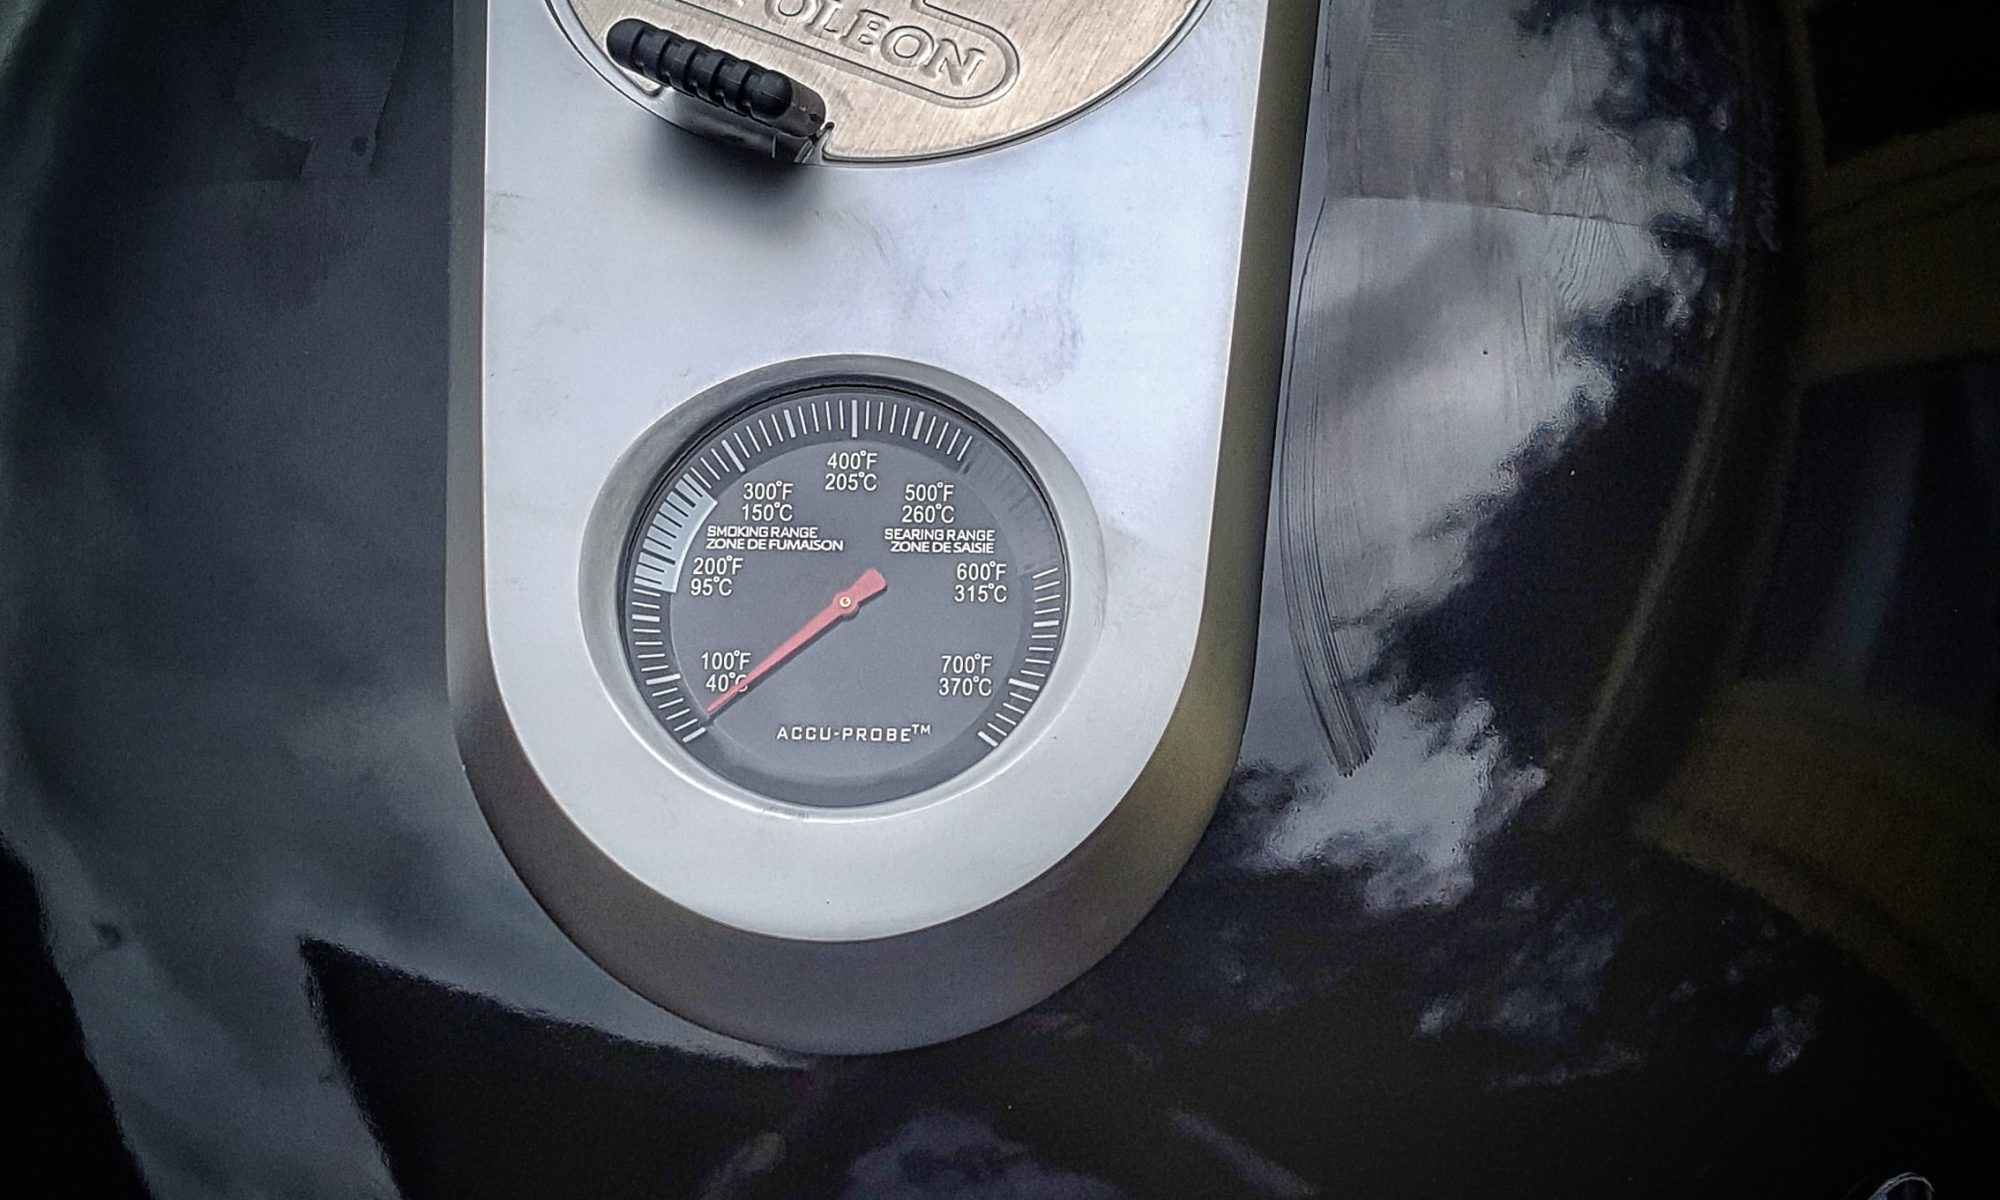
      The grill is a real design thoroughbred. It seems very efficient on charcoal consumption and in fact you need to be very careful not to light too much coal if you want to keep temperatures low. On the contrary, it is very easy to get the cooking temp up above 250c. The cast iron grid itself I really like. It is hinged so you can easily place wood on the coals for smoking, or add more coals. The hinge itself is more of a hooked over part of the grill, which means you can easily remove the sides for cleaning and you don’t get grease stuck around the hinges. I really like the look of it with the Napoleon flames in the middle and the wave pattern. Like other parts of the design it is not just for looks, the wave design helps keep smaller things top side of the grill.

      Napoleon is a Canadian company that began life as a steel fabrication business in 1976. My review mentions “design” and “easy” a few times, so it comes as no surprise to me that Napoleon has lead the way with new and innovative patented technology across its ranges. The jury is out on whether the steel diffuser plate adds anything or not, I would lose that and include charcoal baskets which currently do not come as standard.

        Saag Aloo

        Saag Aloo

        • Prep Time15 min
        • Cook Time45 min
        • Total Time1 hr
        • Yield4 Servings

        Ingredients

        • 3 tablespoons of ghee or butter.
        • 2 - 3 tablespoons Garlic/ginger paste (5 or 6 garlic cloves and a thumb of ginger)
        • 5 green cardamom pods, cracked slightly
        • Stick of cinnamon
        • 1 tablespoon of cumin seeds
        • Two bay leaves
        • 1 Tablespoon garam masala
        • 1 teaspoon of salt
        • 1/2 teaspoon of turmeric
        • 1/2 teaspoon black pepper
        • 3 onions finely sliced
        • 1 x 400g tin of good tomatoes
        • 1 Pint of stock with a teaspoon of garam masala and a clove added
        • 500g potatoes (waxy)
        • Big bag of fresh spinach.

        Method

        1

        Set the Weber up for indirect cooking- coals left and right with central sanctuary.

        A wok type pan with small handles that fit inside a closed lid, cast iron Dutch Oven or the Weber GBS pan would work best. (You’ll need a glove)

        2

        Start with the pan over one of the fuel sides and add the ghee/butter.

        3

        Fry the spices for a minute being careful not to burn.

        4

        Add the garlic/ginger paste and cook for a further minute, stirring continuously.

        5

        Add the onion, and cook for a few minutes until soft and glossy but not too brown.

        6

        Add the potatoes and turn everything around to coat.

        7

        Add the tomatoes and most of the stock. You want to try and cover the potatoes.

        8

        Place the pan in the centre of the grill, lid on and vents wide open to simmer. This should take 30-40 minutes or until potatoes are tender.

        9

        Whilst the potatoes are cooking, wilt the spinach down in an inch of boiling water with a teaspoon of salt and half teaspoon of turmeric added. (If you’re hardcore, you can do this on your ‘other’ BBQ. I did this on the stove)

        10

        After a couple of minutes, drain the spinach and let cool enough to squeeze much of the water out.

        11

        Chop through the spinach and add to the potatoes just before they’re cooked through.

        12

        Mix well being careful not to break up the potatoes

        13

        Let the Saag Aloo reduce to your desired thickness. Add your reserved stock if needed.

        14

        Serve with Naan

        Recipe by Mike Cheryl Saunders

        Free Recipe Card

        Saag Aloo

        Download the free PDF Recipe Card

        Char-Broil Kamander – Review by ArtustBBQ

        Kamado style barbecues are having a bit of a boom in the UK at the moment. In a market that has always been a choice between green or red (Big Green Egg or Kamado Joe), there now seems to be a new option wherever you look. Even the supermarkets are getting in on the action this year selling unbranded and unknown brand kamado style grills at seemingly very competitive prices. There must be over 15 different brands and models available now in the UK market, most of which seem to be coming from imported brands with no presence behind them. So whilst paying sometimes less than a quarter of the cost of the main two players for what looks like a similar grill may seem like a good deal, is it really? One thing we have learnt over the years about ceramic is that it is delicate, and heavy. Very very heavy. So you pretty much need to pick a spot for your ceramic grill and not consider moving it for a while, and of you do decide on a change of spot then proceed with caution as knocking that grill over is not an option.
        But what are your other options? Well, in the last few years an alternative to ceraminc kamado’s has also stepped forward in the form of the double walled steel versions with insulation in-between. So is this a good alternative? We were very kindly sent the Charbroil Kamander to test out and see if it stands up to the test.

        It’s always a good day when a new grill arrives and when this bright yellow Charbroil box arrived on a pallet it was smiles all round. There were two of us unpacking and building the Kamander and it took us around 45 minutes to put together and was pretty straightforward as we actually followed the instructions for once. I know the usual process is bin the instructions and see what happens and keep them for fire starters later, but we wanted to do this by the book. There is still a little weight to the unit so definitely worth having that second pair of hands available. The pay off was the first feast off the grill for helping out which was deemed to be more than a fair trade.

          So let’s start with the weight. The Kamander comes in at around 52kg which is about a two thirds of the weight of its equivalent in a ceramic kamado grill. So a fairly hefty chunk lighter but don’t forget the Kamander also comes set into it’s own wheeled cart with folding side shelf. Figure that into the equation and you start to see this is a fair whack lighter than similarly sized ceramics. But does lighter mean a drop off in performance? We have put the Kamader through a whole host of different cooks to see. The cart the Kamander is set in is pretty sturdy, if you clip the lid shut then then large handle acts as a grip to lift and roll the whole unit around with on its back wheels. The Kamader grill has been stored a few meters away from the cooking area and moving it across the patio and grass was easy thanks to the large rubberized wheels. The side table on the cart pulls out and drops to the side whilst remaining attached so that the storage space needed for the grill set in its table is less when stored and covered. This handy side table is helpful for many things including preparation, holding ingredients or fuel or even your BBQ cookbook of choice. There are also a number of tool hooks off to the side of the table making it handy to hang your tongs and grate tool etc. These are a little fiddly as they sit underneath the lip but a few attempts has your tools safely stored and out of the way. But the side table in this instance serves a bigger purpose, as a quick glance shows a daisy wheel vent housed to the back right of the grill itself inset into the table. This is part of the very clever vent system that Charbroil has used on the Kamander making it easy to make temperature vent adjustments without having to lean under the grill. Whilst not an issue for most to lean under a grill, anyone suffering with back issues could find this really useful when combined with the lighter weight of the unit itself. All the usual features are there such as a temperature dial that reads up to 425c. Yes that’s Celsius not Fahrenheit. A giveaway about how hot this unit can get with its insulation. The gasket between the lid and the main bowl is not of the felt variety that has been seen on most kamado units until now, but is the new style and harder wearing braided unit that compresses when the lid is clipped shut to form a tight seal and also acts as a cushion should you drop the lid. There is a latch to clip the lid shut to form an airtight seal and a large lifting handle. As the grill is steel construction and not ceramic the lid does not weight a ton making them hard to lift one handed as with some grills. The cooking grates are porcelain coated cast iron so hold heat in really well for those classic grill marks on steaks but also remain easy to clean too. The grate comes with another neat feature as it is in 2 parts. There is a very small section at the front that is removable with a handy tool CharBroil include that means you can easily top up on fuel or smoking wood mid cook. This doesn’t fit 100% tight for the first few cooks and feels like it could slip, but get a few cooks through the grill and it holds much tighter in place. There is also a very handy removable step up grill included with the kit there are 2 slots (left back and right back) that this can be slotted into, and then there are also 2 heights that the step grill can be set too. Very handy for those cooks where you need some extra space or it can also be used to separate food types if needed or also as a warming rack. But another neat feature of this is that is can swing out to the side of the grill giving you total access to the food on the main grill or act as a super cool zone away from the grill surface if needed. Underneath the grill there is a hanger in which you can place the drip pan which also acts as a diffuser for smoking creating an indirect cooking set up, but also can be used as a water pan if you so wish. The pan isn’t very deep so would probably require fairly regular top up’s during those really long low n slow cooks. We have been foiling it during cooks to keep it clean. Working your way down you have the charcoal grate, then at the very bottom of the grill sits the ash pan which has the air flow holes drilled into the sides at the top. Thankfully this pan is very deep meaning you can crack though a fair few cooks before it needs emptying. But they have thought the design of this through well and it has a lifting handle across the middle for easy removal.

          So having had the Charbroil Kamander unit in the line up for 3 months now and having cooked upwards of 20 cooks on it, I have to say I am very taken with it. Having yearned for a ceramic kamado grill for a number of years getting the opportunity to try the Charbroil Kamander was one I grabbed with both hands. I have cooked everything from a 14hr low and slow pork shoulder, chilli brisket, spatchcock chicken and lamb ribs right up to high heat steaks, seafood and even some brownies and it has coped well with everything I have thrown at it so far. The side table really plays a big part here with having somewhere to rest plates, rubs, glazes and tools which is something none of my other barbecues have. The built in tool hanger is very handy in keeping the table surface clear or tongs and lighter. It has taken some adjustments in my cooking technique to learn just how much heat these type of grills retain but learning is what makes BBQ fun. You definitely need to light less charcoal or briquettes on start up with these types of grill as once the insulation kicks in the temperature will climb rapidly and given the chance it will shoot over your desired cooking range. So some minor adjustments where needed in my cooks to ensure the temps stays level as the grill does want to cook hot. Briquettes are definitely recommended for low n slow cooks to keep in that 107c/225f-135c-275 sweet spot. The pork shoulder was cooked using heat beads briquettes and it sat in this range for the whole 14hrs with minimal vent changes during the cook. The one thing you will find is that the vents need to be shut down a lot lower than on some grills due to the nature of the insulation, again too much air going in will make the temperature rise above you desired cooking range as with any grill. For higher heat cooks this grill comes into it’s own. The charcoal grill is a little lower from the cooking grates than on some grills but this doesn’t seem to affect it. A good covering of some good quality lump charcoal on the grate can be lit and have you up to those 425c-797f high heats for the perfect sear in no time at all. One simple cook of some Sherwood foods Tomapork with a simple salt and pepper rub and some oak wood chunks had one guest asking how it was possible to get so much flavour into pork. That was a good moment and cemented the fact that the Kamander has it’s place in the barbecue line up.

          Conclusion

          The big players in the market make amazing units and have great reputations for quality and after care, but the cost makes them prohibitive for most people. The Charbroil Kamander comes in with a recommended retail price of £699 in the UK making it very very competitive against most other brands out there. But there is one small sticking point in that this grill sells at a lower price in the US. But that said, taking into account that mark up applies to every other grill and product imported into the UK, you can see that it’s something you have to swallow and that it’s still a very good deal. Also, if you keep your eyes peeled there have been some deals around for as low as £499 saving you a massive £200 and making the Kamander a no brainer in its market.

          Once again the Kamander grill was supplied to us for review but we are free to add our own thoughts and have been honest and fair in our review.

          http://www.charbroil.eu/

          http://www.charbroil.eu/kamander-140-870