
Meat Matters son Will Woolnough shows how easy cooking brisket can be. Follow Will on Instagram @bbqkids
Will Woolnough – Son of a Brisket
- Prep Time20 min
- Total Time16 hr
- Yield4 Servings
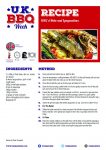
Ingredients
- Brisket Point
- Rub of choice, (Marcus Bawden Moca Rub)
Method
Dad let me borrow his KJ 2 as my junior was FAR too small for this dinosaur! ?
I got my BBQ stool and dad helped fill the BBQ with charcoal. We then set it with the deflectors (indirect cooking) and a pan underneath to catch drippy beefy fat stuff and we added some water to help the bbq hold its temperature.
I trimmed all the hard fat off from the top and bottom. Being careful using my new knife!
I then rubbed Dad calls it his ‘stash’ of Marcus Bawdon’s Mocha rub on it! It smells SOO good!
At 10pm! We waited until the BBQ was at about 110c ish and placed the brisket carefully on the grates, closed the lid and went to bed!
I couldn’t wait to see how it was going, so we checked it at 5.30am and it was at 78c and the BBQ was still at about 115c, checked there was enough charcoal and there was LOADS so went for a swim in the sea and stuff.
Came back at 2pm and the internal temp was rising but we wanted it for dinner so with dads help wrapped in butcher paper for the last few hours to get it hurrying as the smell was driving me CRAAZZY!!!
4pm we checked and the temp was right on at 93/94 all over but dad likes to prod the beef and I LOVE testing it! I just KNEW this was done as it was jiggly and felt like lava underneath!!!
We let it rest in the Yeti wrapped in tons of mums tea towels but shes doesn’t know yet!
I was able to help carve but because the brisket was so big we had to use a MASSIVE knife!!!
Dad has promised short ribs next!!